Build Log: M57 X5

Torgus

Brigadier General
Nov 6, 2016
2,671
2,194
0
Boston
Ride
ACF 6466 E92 + METH
I bought a mint one, love it. Best daily driver part is that it doesn't egg you on to push the throttle (good for keeping a clean record), but if you want it to haul, it will get up and go. If not enough juice for you, delete it and tune.

yes this thread is fantastic. I'll start one for mine, when I get enough going on it. Won't be anything like this thread, though, lol!

Filippo

Do you at least have a jbd? If not well worth the cost.
 

fmorelli

Lieutenant General
Staff member
Aug 11, 2017
3,748
3,592
0
57
Virginia
Ride
E89 Z4 35i, F10 535d
Not touching drivetrain yet. Doing a variety of other upgrades first. Winter is crap so not working on stuff until it gets warmer. I'll decide what to do over the summer after I do all my 100k maintenance work. This is the daily sled. Z4 has much work that needs doing.

Filippo
 

TwinTurboWagon

Corporal
Nov 7, 2016
223
241
0
San Diego
As I am researching all things towing regarding the X5 and the probable Sanger V237 boat purchase I wanted to get an updated weight of the X5. Notable changes since I weighed it last are the Brembo BBK and Camaro ZL1 wheels + tires.

With a full tank of fuel, no driver, and no cargo the X5 came in at 5,100lbs.
ACtC-3fOeoxbejiAfCi4_RxEL6988XILJQvGUCN61dbBVAZSyBUziHKl5E1Jwj64tun5BA129h3hlAtcF6-s44KL5vb3mDoA3NmZaKk2SDJ4SjT1GTuRpu1VvFqdxwMkh-TrLfNM0A0Lc3k103c6XNDn-s3T3w=w1300-h976-no


I removed all the "essential" cargo that is stored under the floor and I lug around on a daily basis. All this stuff came in at ~70lbs. Much more useful than the 100lbs of folded 3rd row seat it replaced.
1. Rear seat protector for the pups
2. Shopping Bags
3. Emergency roadside kit I made with hand tools, sockets, tire plug, air compressor, and emergency First Aid kit
4. Microfiber towels
5. OEM BMW Diesel specific (unlocking) funnel
6. Glass Cleaner & Quick Detailer
7. Changing poncho (For MTB)
8. Small changing mat (MTB)
9. Emergency kit for the pups
10. Mobile Car Jumper / Emergency Battery
11. DC-AC inverter
12. High strength towing straps
13. Fox seat protector
14. 1,000 Ratchet Straps x8
15. Hitch ball, hitch locks, and OEM cargo rail eyelets
16. Manual
17. Jumper Cables
18. Extra Oil
19. Shop Towels
20. Gallon of water
21. Tire pressure gauge
22. LED illuminated frisbees, not 1 but 2!
23. Samsung tablet + OTG usb + K+DCAN
24. USB charging Flashlight
25. Seatbelt security straps
26. BIG ASS ZIPTIES
27. Ice scraper
28. Bike lock cable
ACtC-3dBsU3W_gn97OSRDHs5iBYWR6g5hOnIhxbC_Bqz1sMRUysuTjOLhYdR0KtKy1m7Oqf_aHXykSGSofPahIrkPJmRvdJ7bKWewpXDb7fMYOcK6fB3EJtdGZVPv6fXzPKSDH4ZJ2K4zhfal3QEkfdyK-PQjg=w1300-h976-no


Elastic on K&N dry charger failed and I will be trying to get a replacement.
ACtC-3dWqxtEHUzE7N9A2f4CQKgEnldhsLsWeZPAVRW3SB9ftamibCfVk4B6ztAK0I1eQmXSNI3c_OlRq1hDS0Iomt-0yUmVBtdz3KBwRuiMFThg_0-vcwxJPYeGlL6G7Ip5mTnGrcE_bUsGYWbqN5KXwkkB_A=w1300-h976-no


I wanted more light in the cargo area of the X5 so I added some OEM-style LED puddle lights to the D pillars. The bezel which once housed the 3rd row seat belts made for a great location to mount the lights. Tapped into the OEM wiring for the tailgate light which was conveniently located right behind the passenger D pillar.
ACtC-3eyxu7NFB_q6uJJ35J2t57JrjxdGFiDkKw61d5lU18_6mfJRYXIJLdNLiYkzV0336andRMA4bvbmlb_DinclHX97ln0QVWN-xM4AvUfH2pnwg5d4gf_LJCnWcLAqm9MNJkCkWXeKM-ufzI8vms8-rOmpg=w1300-h976-no

ACtC-3dmTQcX_Cft43zEao-6iW10JqnQ1I-DbPkMotIOrHb4v2FoWcboZmVG4nXDafB4Y2Hcv2cYoulnZtd8eT0TX1idqmJ2YJh30WBoSxx45rUuyzudxOcXNLpHTz_yqu7FCDLorSXvn5QVjywDk9y6h3KQAw=w1300-h976-no

ACtC-3e7HLyJKDXm2TWk7xhhmy46X8xfjYax9jfFfnXpzkSupWCJ2lHoaVfJ9qn9tFkvswVr1XyaTXQfhUagCzQ8jyRuhqondpF_xL86Kf0n8jUqRAiR3CqIuxPDdZ_VcAWaNnfUwxrHN1voZdQ7v55vBRBTeA=w1300-h976-no

ACtC-3f9mA2jBHjcXIYEgFp17CO8fQrl5ohunhU1r6DlAiE83iuYZggf_sGVkmMhT2jjpbxoBse6gduidQIE4oDwSjcPBUcNSveiSMRHIWPhZHE-t7q2Br_KIOR9i5-uF5-wfst0Q-GmiCv8vQppYexl8TQHHw=w1300-h976-no

ACtC-3fNncF2CFC3zv-gcdMcll2bAHN2AXs3uJ6ljyZhDl3VS-2j27wze788TA_vGMVcCBVEvm6RgBwYYV5jNg-XnEcH-6tI43_4qABtMM8b0IslwC_5PS79CdhGgUiZtb9T1XLwIxWiwM5QK5VMkcfwHZz8gQ=w1300-h976-no


Here is the end product. Exposure is locked for both photos. Very happy with the result.
ACtC-3cxAtk4f1lBJobbDsObTjs4dHDRdxHb8hEb58xUkOYf3PpW_Jq0eUKUEaHXy-hkzWuCC4shJGuUBbvtj2kfoB9NGrjI5_T1rurW7V9qF1BTYcqU8clKOkRK_MQ7STFfCHc2xmvlIx5SMmeuhtPPEbAJIA=w1301-h975-no

ACtC-3fl1yeQdce4dCx56S4U2tueAuoOaVFY6S4nbi4KJU8g9andXosrXTh3vRRw-kYc3z41Kp0YoodNYIJc8VJZPpoPuvBaMtT9iBBrzN-3aEnKRU4dlqjY8koc7a6C5z8I4UeoTJ5_SCCXb4N3Bb5JOR946Q=w1300-h976-no


Here are a couple random recent photos.
ACtC-3cyweqj4GCzK8kHPwAXRo35j8CPH9DlxaDXGkvu824y4h8KGLMJ2EPLez9iTtdngs62_dqqhvqTUHxVCy95DPk4hw29mhAaCeenoyBxx9VpOXvyEKs6Haz6dgFQCYHaIJ6m-hZSaJOsmtX7LM52JkVZ3A=w1300-h976-no

ACtC-3fZLAQjx2gM6HQZsgFF3ACZadTebX7ZZvG3btGxHen1WIjcHGYXRC1_worIhl9_xhE5a6nOGioMLYgg-DeYO9ZJdOFnT8ueYsnno1QsbB3ytEFQitEGZjW2GOmCt1njjjl6YG_J_AvHI1MoMDpF9JcrRw=w1300-h976-no

ACtC-3ei7Rgj4AT2SYLRGrnnGhxjhlfxgECsKvfxN_kOYTXxC3Ce3xjgxTfNqt5i8BI7bOBtUg9udilisSxMd3KGtBW0RduqyJnG5CfMvsSujBPo-LV-YLK2WyTPflITc8NM6-LL6CxWqw_jo4sYyYOMNEbPKg=w1300-h976-no

ACtC-3dWRAdhs4RWTJxAdyH5sN6xKtH6_S0Suy41K1pzMZxs-CrFDUUuE3LmWPSE5asqtPFnnPjlRRqXrndw4Ubk5IdSFmFkbjDU68FqnRr2O-k8zDqFjqOSEJxnBFY08F0uLpQjg7VuU6Pa28i7VQeeFjfxdw=w1300-h976-no

ACtC-3cOr8gbZvpfcylw2BCwxOoQjFtsFDUgicgU4Le-DUQpevFfMwzX5YxzPgTMF-p0fxBaFsthhAxmAgYoiT0-lgXJQ7d8fogdrAnENLGC57Zucizhvb8kNxiQuYx6gLYKaTBz5uIQUnGEClZfr1SCW2eNIA=w1300-h976-no
 

TwinTurboWagon

Corporal
Nov 7, 2016
223
241
0
San Diego
This is mainly a picture update but there are some exciting things on the horizon. The pile of X5D parts in the garage is growing. The X5 will have some substantial towing duties in the not-so-distant future when a boat comes into the picture so I am collecting a few additional mods/maintenance items to make this a well sorted towing beast.

Sutphin Torque Converter
Suspension control arms, bushings, etc. F/R
Eibach springs F
Arnott air bags R
Koni FSD struts F/R
PPE high capacity transmission oil pan

In search of a better ride quality from what my H&Rs offer I had Eibach springs on hand and with the current 20% off promotion for the Konis I figured this was the time to give them a shot. I patiently waited to see if I could find a deal on KW V3s but that never happened so Eibach + Koni FSD seems like the best option.

The trans will get a big overhaul with the upgraded torque converter (thinking about the upgraded valve body too) the high capacity PPE pan will need a custom solution to connect the replaceable filter to the OEM oil pick up. IN addition to holding more fluid the pan has a bung for a temp sensor which is AWESOME because I can wire that directly to my P3 vent gauge and I can monitor live trans temps. If needed I can plumb in an additional trans cooler to regulate temps, The logical choice is to mount a radiator under the passenger headlight to mirror the driver side.

Any-who, exciting stuff. Preventative maintenance gets me all fired up.


Here are some pics from a recent trip to Flagstaff and Sedona AZ.
Funny back story, my in-laws used to own a Toyota Highlander, a Toyota 4Runner, and a Porsche Cayenne and now (they say, it's me fault :) they sold all those and now have a 2020 X7 xdrive40i and 2021 X5 xdrive45e.

Both are awesome but the X5 is particularly impressive, although smaller the X5 has 300lbs of added weight and the same air suspension system which makes for an unbelievable ride quality, it's better than the X7. Add in the ability to run it in all electric mode which makes it deafly silent and it's a really impressive ride. I am a huge fan of the vehicle but I feel BMW did an injustice by limiting the electric range in the US market to 30miles, in the Eu they get 50miles. The charging rate is also PAINFULLY slow, for a full charge on the US model it takes ~24 hours. Bump the range up to 50 miles and reduce charge to 12 hours and it's a slam dunk.

If you look at all the fuel economy data on Fuelly for the 45e the tank average for all owners is 41mpg, not bad for a 5,600 vehicle with 390hp and 443tq
V0TAEgLZijOFOU08fF3BYkp9g=w1300-h976-no?authuser=0.jpg

E4Y2xdDgLM_cpXJ7WjfawSvAg=w1300-h976-no?authuser=0.jpg

Xvv1EQHKk5ZzfpWOIEU9-ULNQ=w1300-h976-no?authuser=0.jpg


Averaging 26mpg highway @70mph with the cargo box and bike, not bad, not great.
W8m6X70ScJWxDbq9BgNmMw7lQ=w1300-h976-no?authuser=0.jpg


Some mild but rough off-roading to arrive at the Schnebly Hill Overlook. The taller 45 aspect tires were very welcomed on the terrain but 40psi tire pressure and H&R springs were far from ideal.
FZfsjRoknZzPqwBNprTH24qOQ=w1449-h975-no?authuser=0.jpg

dy-NGHx43p1a9rZuqYgRrR05Q=w1300-h976-no?authuser=0.jpg

sfisla3GM1ni87SCRU9F_lYxw=w1300-h976-no?authuser=0.jpg

nRhRpc3kiTHFVYUi6Ux0u0lXQ=w1300-h976-no?authuser=0.jpg
 

fmorelli

Lieutenant General
Staff member
Aug 11, 2017
3,748
3,592
0
57
Virginia
Ride
E89 Z4 35i, F10 535d
For guys that are bagged, looked at Aerosus. These are excellent, according to a BMW diesel mechanic friend. He also suggests spraying these down with silicone spray a couple times/year so they last.
 

TwinTurboWagon

Corporal
Nov 7, 2016
223
241
0
San Diego
The X5 had a big weekend under the wrench!

✅ Oil and filter change
✅ K&N filter cleaned, oiled, and new dry charger
✅ Eibach front springs
✅ Arnott bags
✅ Koni Active sturts
✅ Control arms, wishbone, ball joints, and integral links
✅ Revised vehicle coding
✅ Exterior washed and leather seats/SW cleaned
✅ New aftermarket flares which are shitty but not as shitty as the last set.

It started with a wash
bjTwDzAsvkjtlqFxvL7BngfYA=w1038-h977-no?authuser=0.jpg


Some of the suspension goodies.
bwhcO9LiOPh4prOhuGvTXDFNA=w1300-h977-no?authuser=0.jpg


Nothing beats a good driveway for wrenching
jOEjfP02pbbGEq0K4TOddKOIQ=w1300-h977-no?authuser=0.jpg


H&R vs Eibach are almost identical in length, H&R looks to be slightly thicker and also has an additional 1/2 coil
9Zh7I0hY-Z8NqiIHMe2i24a7Q=w1300-h977-no?authuser=0.jpg


Fronts installed
lrvVFkLWI4OiJF8YxQmbMWpfQ=w1300-h977-no?authuser=0.jpg


Oil change. Hopping on the FCP lifetime oil train.
hvZsiLhXtsu8v_3B_GuDkUX9g=w1300-h977-no?authuser=0.jpg


You can see how long the stanchions are on the Konis, Konis have 6" of travel and the old KYBs only had 3".
G9yKe08tvmGqf-bsSGukHSXfg=w1300-h977-no?authuser=0.jpg


With my non-rear air strut mounts and custom spacers it was easy to accommodate the Konis (which are not listed as fitting a X5 w/ 3rd row), simply remove the spacer. The Konis are compressed just over 3" at static ride height which means there is just under 3" of travel to play with.
G9yKe08tvmGqf-bsSGukHSXfg=w1300-h977-no?authuser=0.jpg


Took the opportunity to clean the wheels
rMkSH4NwHyZi__uWb97pBCNsA=w1300-h977-no?authuser=0.jpg


Rear buttoned up. I wasn't able to get the ball joints done but I have the proper tool on the way.
kak3LV73oSuJ41oWe6RgblgAw=w1300-h977-no?authuser=0.jpg


Option 1: replace air bags BEFORE they fail
Option 2: Neglect your airbags and when they fail quickly go to the internet and complain, followed by possibly making a bad situation worse and converting the bags to springs.
I chose #1
VyUMjZnwcvWC5AxnWea3I_LjQ=w1300-h977-no?authuser=0.jpg


Doggos!
jbtIJshzw3KwRnoghK0AmiTyQ=w1300-h977-no?authuser=0.jpg


K&N before
EDfcJQYUpUBNy5pVNwrxFkSEQ=w1300-h977-no?authuser=0.jpg


After cleaning and oil, better but not perfect.
2bUWGPOidNQLRioJ-tkrQHl4g=w1300-h977-no?authuser=0.jpg


Time to get dirty
hxc9Lq5tFHzJS-EKsWKU14Hnw=w1300-h977-no?authuser=0.jpg


Bonus! I am a sucker for unique mods and especially OEM retrofits so this project is very exciting. What you are looking at is a 3.15 electronic LSD from a 20,000 mile X6, F85 X5M flanges and axles, ICM and QMVH modules. Once the flanges are swapped the diff is essentially the same unit found on the F85 X5M. My research tells me I should have success integrating this system into my E70 which is very exciting but it won't come without some work. More to come.
F0SGgJ3tZM9m3j0XOZZa81CBQ=w1300-h977-no?authuser=0.jpg
 

fmorelli

Lieutenant General
Staff member
Aug 11, 2017
3,748
3,592
0
57
Virginia
Ride
E89 Z4 35i, F10 535d
Very nice. Couple things - not sure if you are aware that the air pump for the suspension has desiccant inside that goes bad. Bad enough the pump goes south. If you know great. If not there is desiccant on amazon that works well for this setup. Not a hard job.

Also curious which wide flares you went from and to. I have ECS Tuning ones, after set 1 (general China) sucked.

Oh one last tip. Paypal has a free returns program. If you order your oil and pay with Paypal, you can print a return label from Paypal to send the oil back, at no cost. Now truly no cost lol.
 
  • Like
Reactions: Itsbrokeagain

Torgus

Brigadier General
Nov 6, 2016
2,671
2,194
0
Boston
Ride
ACF 6466 E92 + METH
Paypal has a free returns program. If you order your oil and pay with Paypal, you can print a return label from Paypal to send the oil back, at no cost. Now truly no cost lol.

Free oil changes for life now! Thanks FCP/Paypal
 

TwinTurboWagon

Corporal
Nov 7, 2016
223
241
0
San Diego
Very nice. Couple things - not sure if you are aware that the air pump for the suspension has desiccant inside that goes bad. Bad enough the pump goes south. If you know great. If not there is desiccant on amazon that works well for this setup. Not a hard job.

Also curious which wide flares you went from and to. I have ECS Tuning ones, after set 1 (general China) sucked.

Oh one last tip. Paypal has a free returns program. If you order your oil and pay with Paypal, you can print a return label from Paypal to send the oil back, at no cost. Now truly no cost lol.
Awesome info, thanks for sharing. As for the desiccant, I have a bunch of packets I would use for headlight projects, can you offer some direction on where I can find info on how to service the pump? It sounds like cheap insurance.

My flares were from Amazon via Spec-D, they are "fine" but have visible molding marks on them. I am rolling the dice with cheap flares in the hopes of finding a pair that is cheap and not garbage. It's hard to justify the price for the quality ones when it's such a simple piece of molded plastic. How hard can it be to make, apparently real hard for the aftermarket companies.
 

fmorelli

Lieutenant General
Staff member
Aug 11, 2017
3,748
3,592
0
57
Virginia
Ride
E89 Z4 35i, F10 535d
Try this ... same as F15 basically, but this video segment shows you the pump (which is easy to find and remove, along frame rail. Once you see the old desiccant you'll laugh:


Ok here's the replacement stuff folks are using:


Hope this helps.
 

TwinTurboWagon

Corporal
Nov 7, 2016
223
241
0
San Diego
Good times continue for the X5D.

It looks like the axle-back exhaust will need to be reworked after the F85 differential is fitted.
c12mCPKL-tHkcuV5o1jNefDHPg=w958-h719-no?authuser=0.jpg


New pano roof weather stripping. Unlike my 08' E61 it looks like the 12' X5 came with the updated version but it still shows 9+ years of use.
UPqbEmBg1oUAZCB7uMixNTe88w=w958-h719-no?authuser=0.jpg

z3JPKirf8UQ5hXl8TUeLncExGQ=w958-h719-no?authuser=0.jpg

tOHH6gNLpEnwUZmxYfdjs7DLzQ=w958-h719-no?authuser=0.jpg


Plasti Dip on the front/rear bumper trim was refreshed since it was showing wear after a couple years of use.
muxjOE5iiRg97bFCt4FETWTHTg=w958-h719-no?authuser=0.jpg


Resolved an annoying vibration caused by contact between the rear dust shield and caliper brackets, can't believe I didn't catch this during the original install...
zv9g6n7YsuNUiPJxdkYs80O7OQ=w958-h719-no?authuser=0.jpg


With the proper tool I was able to complete the suspension refresh and install new rear ball joints.
sVcubJUjk6H-3onGYAFE5EH8PQ=w958-h719-no?authuser=0.jpg


Here is a picture of me installing the ball joint INCORRECTLY.. lol :lol:
G3rfZWLSA18HwooR1S9D1g3kSQ=w958-h719-no?authuser=0.jpg


Accessing air compressor to refresh the silica gel that filters the exhaust air.
9niV2kIlFCWV6ko0cJNwEhFmsg=w727-h968-no?authuser=0.jpg

P5YTCmsVeL1YyF8pX_eeoOsXMg=w958-h719-no?authuser=0.jpg

06hOwnuNCbEZdGKO3Q07KoQ5Zg=w958-h719-no?authuser=0.jpg


Tryin to repair an issue of the sun-partitions being disconnected and rattling. At first I thought I fixed it, then I broke it, then got it repaired even though it should still be broken. More on this later. What a pain.
VHVygvpECLs0qBO59zsxgy-u9g=w958-h719-no?authuser=0.jpg

zlnlm-Q7C-JY8Erb4D_49CuYyw=w958-h719-no?authuser=0.jpg


Upgraded Torque converter install time!
PgExbJbZMBrkskzufb0904vIig=w958-h719-no?authuser=0.jpg
S2Zln6pzyuAOwu7sNqkE3UibAA=w958-h719-no?authuser=0.jpg

hxunqzYuSVHGlWDFPOoL-RYXGg=w958-h719-no?authuser=0.jpg
wbLXkxwJi-JLVrR_j6UfXT5HJw=w958-h719-no?authuser=0.jpg

fMI5y9P7VWq-oOcif7uxTkel7g=w958-h719-no?authuser=0.jpg

bmbqzf2M2ynG7jScr-U4s1H2yA=w958-h719-no?authuser=0.jpg


Although the trans fluid only had a few thousand miles on it, with the converter getting fresh fluid I took the opportunity to flush the trans again to clear out as much old fluid as possible. Glad I did! New trans cooler o-rings too.
Nykj_1EMcXxLg4cAB4apaw2vBg=w958-h719-no?authuser=0.jpg

TnVns2-ap13QM0BARxOCb2YE1g=w958-h719-no?authuser=0.jpg


Oil around in the downpipe, rugh rogh.
Xbzo7DvdOHOZsXrWDzayoflYZg=w958-h719-no?authuser=0.jpg

b6CNXrxI-RGQRpiHzTFEX-fQSQ=w958-h719-no?authuser=0.jpg


Driveshaft refreshed with new CSB and guibo
Hubt46c0HLx2YS06CvDjmGFW5w=w958-h719-no?authuser=0.jpg

EqgWR93gtx_84oon_hqxI4GKYQ=w958-h719-no?authuser=0.jpg

BBMbUM2COBSqmDrpHHnE0A7hqQ=w958-h719-no?authuser=0.jpg


New OEM windshield. For the record I have worked with Safelite two times for the E70 and E61 and have had a great experience with their install techs.
iSphi4VMEc1eBoKWCvyirMSByQ=w958-h719-no?authuser=0.jpg

B9wQnlG2yPQ_SIimzxPygZN7HQ=w958-h719-no?authuser=0.jpg


New OEM engine mounts. These made a HUGE difference in cabin NVH, especially at idle.
vtrJgvOmbOGAL_4iIDl4mc_Jcg=w958-h719-no?authuser=0.jpg
 
  • Like
Reactions: seb.apprenti

TwinTurboWagon

Corporal
Nov 7, 2016
223
241
0
San Diego
Splash shields cleaned again after being coated with front diff oil and red dirt from Arizona.
lKr5po9_H8CWDyVRjSkBggsqvw=w958-h719-no?authuser=0.jpg


New tool to install transmission/transfer case mount
NP3ELW9XERq6AqTkS2KBOoAQyA=w958-h719-no?authuser=0.jpg


Out with the old
yfEvb8UvtaHY8fHvTy_1mE7B_w=w958-h719-no?authuser=0.jpg

2PewueDJihhi_QCzD3EGR68Lqg=w958-h719-no?authuser=0.jpg

yIY49to7L_h6DFYenjVLe4EhZQ=w958-h719-no?authuser=0.jpg

2Ghw5cmDYnVwXTEMzhrQF4ob7A=w958-h719-no?authuser=0.jpg


In with the new
agEepE3ofKzV27jpVIOO212J1Q=w958-h719-no?authuser=0.jpg


I had the rear diff pulled and F85 axles installed as I was anticipating to install the F85 diff. I was having troubles removing the output flanges so I outsourced it to a local shop and I was expecting them to have success in a day or so but after a week and even having a local BMW foreman come out they were unable to complete the job. But here is a pic of the X5 patiently waiting ...for nothing. lol

It's a bit comforting when I get stumped, I outsource to a competent shop, and they also get stumped, it doesn't help with progress but it's nice to know I wasn't way off track. After waiting and wasting a week, we had a road trip to Arizona planned so I reverted to the basic diff.
9LfPR7birUrHLR-4IZXngwzz6g=w958-h719-no?authuser=0.jpg

Smxx5C3UBXhqfe7_1jW66QOXfA=w958-h719-no?authuser=0.jpg


I took matters back into my own hands and ordered a 5.5lb slide hammer. The hammer itself wasn't enough and I needed to tap/hammer in a couple wedge steaks to put the flange under tension and then with 3-5 big boy hammers the flange finally released.
E1x8bs_tk0feymvKSuJAvBsdmw=w958-h719-no?authuser=0.jpg

bXs8WwZ2ytRiAs0Mx9R-Rm7fow=w958-h719-no?authuser=0.jpg


The retaining clip did it's job almost too well...
4bVl5BJHj7gb_kemGtGUoIZUeQ=w958-h719-no?authuser=0.jpg


X6 vs F85 output flanges
369WLSEBIQOvp2iFbhJsbjwaGw=w958-h719-no?authuser=0.jpg

tQptOp_Vhdb0414DnvaIXTDacg=w958-h719-no?authuser=0.jpg


E70 X5D axle vs F85 X5M axle
Iu9b_-R_kPYbZQVSNqb_nJ7mWA=w958-h645-no?authuser=0.jpg

BgRCEzZqbyR7HyBbFrH7FmEJ8w=w958-h719-no?authuser=0.jpg

fBDsgsBxQejZyxa5C_iqoqbZcw=w958-h719-no?authuser=0.jpg
 

TwinTurboWagon

Corporal
Nov 7, 2016
223
241
0
San Diego
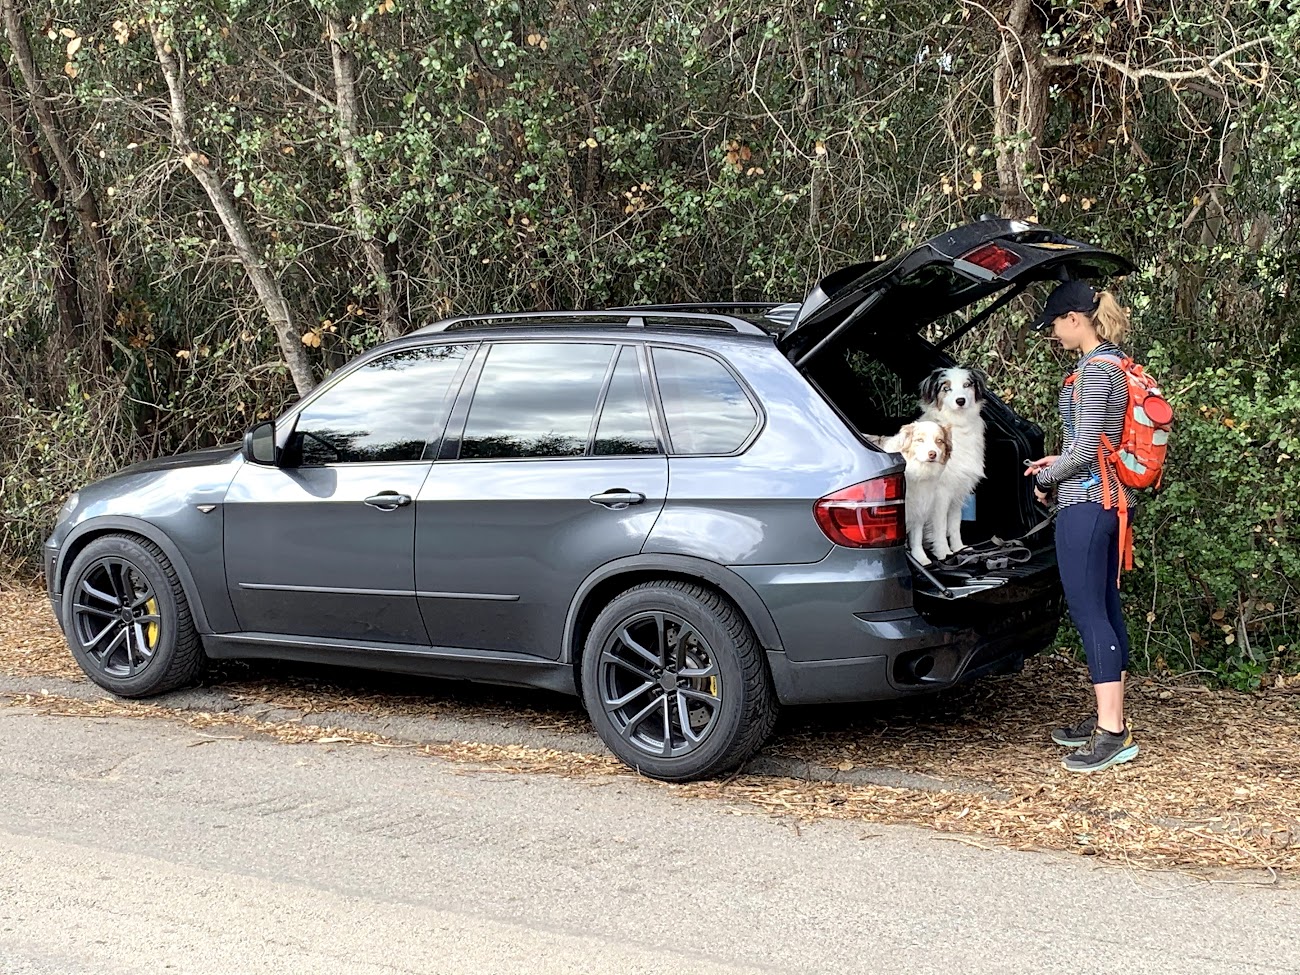
Doggos were watched by in-laws for 2 weeks while we did some traveling, it's nice to have them back in the garage!
7a13yevSCaHkdQzWIJhD5fZUQ=w1300-h977-no?authuser=0.jpg

0R9dPvSeTQ74QIDc4EFx_EEiA=w1300-h977-no?authuser=0.jpg


Current project(s)
THS60W4ELQ_9gcnpCt0IjHKww=w1300-h977-no?authuser=0.jpg


I can't stand working on dirty cars so I like to clean before I begin and clean as I go.
IVWFj5nikE1Ip83F78Gd_OQzWw=w958-h719-no?authuser=0.jpg


First R90 HPFP install
CDqAGj-eeFypJO20H-enFPxWiQ=w958-h719-no?authuser=0.jpg

jxBINGirrV2u9CEOt7diubzvMQ=w958-h719-no?authuser=0.jpg

ku970uFdyq1oR8FpzkxJYz_6EA=w958-h719-no?authuser=0.jpg


Next High Pressure (small) turbo rebuild, no issues just took the opportunity to refresh with Melett CHRA.
a2WVFkwaO3TLcm82MyiuOQb8YA=w958-h719-no?authuser=0.jpg


Big boy (low pressure) turbo out
rICWsA5iLT3wFREXpNN68K9b_g=w958-h719-no?authuser=0.jpg


Tim's Stg 3 vs OEM
HCf1zFtuXGmMwGXymp8tZjTJbw=w958-h719-no?authuser=0.jpg

Hx-UjPRLbzsBDB4FRh_CIsT9iA=w958-h719-no?authuser=0.jpg

v5WhRj7uLWBD0lUxUP8yS_CkiQ=w958-h719-no?authuser=0.jpg
AnBgS6oJQwXxD0D7gharvkTNzQ=w958-h719-no?authuser=0.jpg


All cleaned up and ready for install
YEnUPgFYelICuNSfgBYNXqbkPw=w958-h719-no?authuser=0.jpg


With the turbos out I deleted one of the X5's coolant lines (which was already "deleted" and capped. Plugging the block is a much better solution.
Before
QKutqgGyVTl97RLTbCQPu_C9gg=w958-h719-no?authuser=0.jpg


After
BDkHYWuR7BUNF8XloMXOWy8F0Q=w958-h719-no?authuser=0.jpg


So much room for activities!
yN070b1tp_v21oAne9sod06yug=w958-h719-no?authuser=0.jpg


...Not anymore!
bYrc9PdiYz0LgOmNFCdhIy_J7g=w958-h719-no?authuser=0.jpg


Priming small turbo with oil. After this photo the syringe was sticky and I successfully squirted most of the oil all over the turbo, so much for cleaning....
ThcHk01eR0-uZ2ZI35SgYRFljw=w958-h719-no?authuser=0.jpg


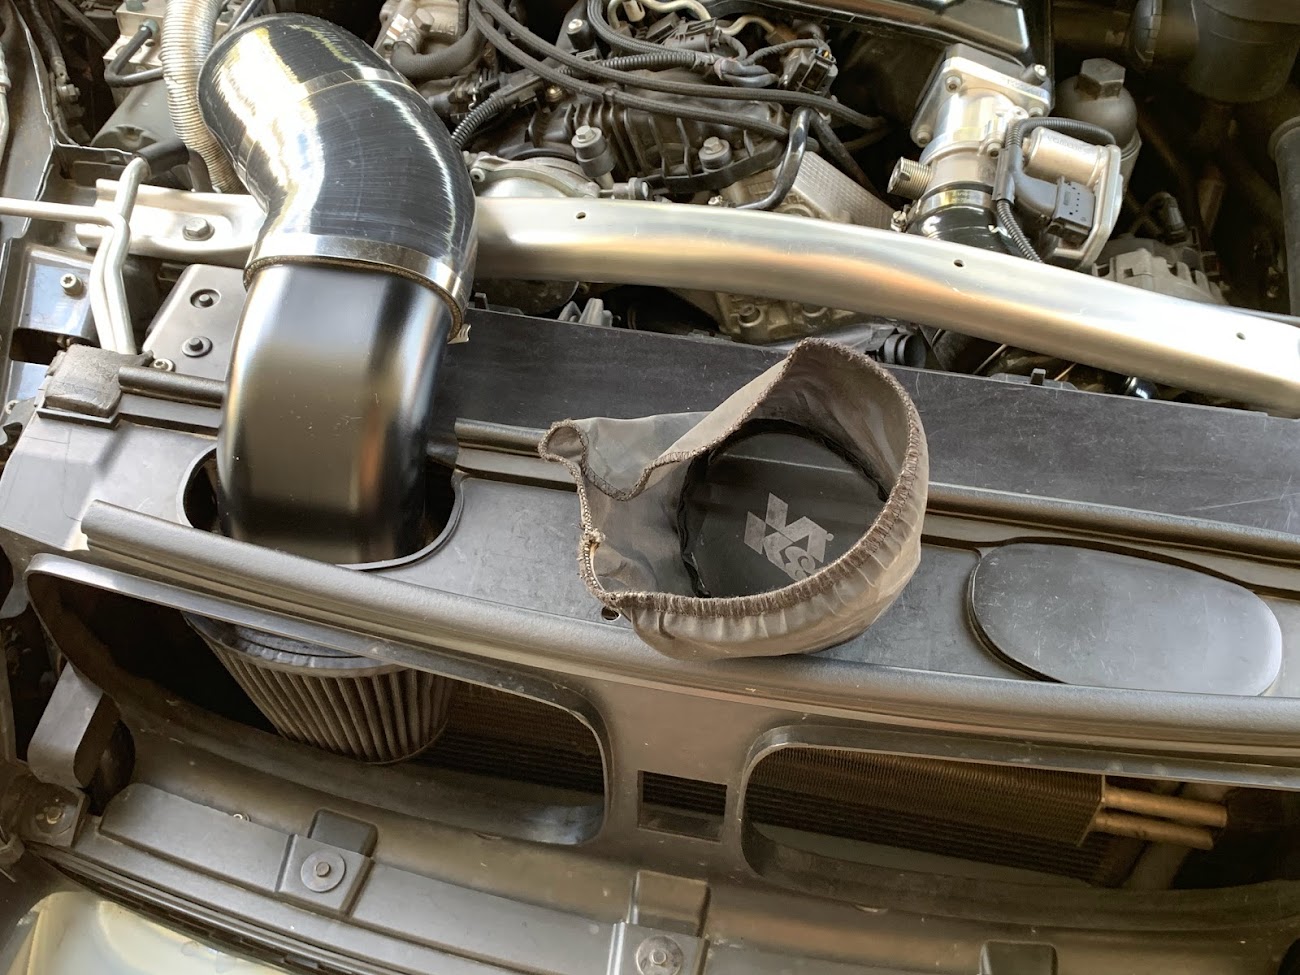
Optimize everything! With the turbo inlet now larger I took a sanding wheel to the plastic turbo inlet pipe to bore it out a bit. The rubber gasket which sits between this pipe and the turbo is still larger than the turbo inlet so this is moot/negligible mod but it ain't hurtin nuthin! +1hp for sure!
LWfcTdtSoNM1Niz31msXzNOW-Q=w958-h719-no?authuser=0.jpg

K_BfbQWjTo3VJpBt5NaJaI2xxg=w958-h719-no?authuser=0.jpg


Next valve cover gasket. Injectors came out easily which was a relief as some can be a nightmare due to neglect and water ingress.
P0Msi2jdYI72O8G-Y7VQHcvqIA=w958-h719-no?authuser=0.jpg


Injectors cleaned with new sealing elements.
SxOi28-XvLi8mtfjM415f8IV9w=w958-h719-no?authuser=0.jpg


Valve cover sparkly after a power wash. There was all kinds of oily reside and grime, carbon on the intake runners was also cleaned. intake ports in the head showed slight carbon on 4-6 but nothing worth correcting at this point.
8JU2iTeD60_8E6GBGGEUFTQWEw=w958-h719-no?authuser=0.jpg


Play bonehead games, win bonehead prizes. Making a to-do list is useless if you don't read the list. I wrote down "clock and tighten HP turbo" and proceeded to NOT. lol.. Meaning the CHRA wasn't fully torqued down with the inducer housing. Thankfully all the tolerances are small and all the other connecting pipes, etc. holding the turbos together kept things together but it was only after a test drive and I noticed some smoking I remembered to torque the 4 10mm bolts. This process required removing the exhaust manifold banjo fitting so I could remove the heat shield and access the bolts. I assume heat played into it but when removing the banjo bolt from the hot manifold the bolt decided to strip on the way out. Fun. Bolt was toast ("special order" item from BMW so I am waiting a couple days for replacement) and it left material in the manifold threads.

The solution was: using a pick, tweezers, and vacuum to carefully remove the metal and then chase the threads with a M12x1.5 die. Always fun to create metal shard just up stream from your fancy new turbo. Meh.
Thankfully I had just enough to get the die and handle into position, if this wasn't the case then this bonehead moment would have been much worse. Patience prevailed as I was able to clean the threads which are now ready for the new bolt.
fMN6OjX3bZJ5F65HaIZTH0n99Q=w958-h719-no?authuser=0.jpg

R6ZHwEyXh_Im-4-V0tWMnD7Xjw=w958-h719-no?authuser=0.jpg

8m9pUMsyjp1Dg9BmOIn2bmyR7w=w958-h719-no?authuser=0.jpg


It's not all rainbows and sunshine. My new turbo setup is still smoking as the previous ones were, at idle and under initial load. My old turbos were performing well according to data logs as are the current turbos, albeit not running optimally since I am still running a Malone 2.9 tune with the hybrid so there is a lot of smoke under load. After a little driving I notice oil coming from the LP turbo but I doubt it's the turbo itself. Since the VCG replaced I will next play with my PCV Catch can setup and revert it back to stock to see fi that helps. Crankcase pressure might be pushing the oil out. Ironically My stock turbos started smoking when I make the swtich from 5w-40 Rotella to Liqui Moly 5w-30? so if the PCV/OCC doesn't resolve the smoking I may try switching oil again. Further diagnosing would be to do a compression test. The X5 feels healthy and strong so I doubt there is an issue here but it would be to confirm anyway.

DDE is off to BRR for tuning. I was torn between sticking with Malone or going with BRR. I have nothing bad to say about Malone but I have seen some other hybrid X5s post data comparing the Malone vs BRR tune and the difference was significant, ~1 second different in the 1/4 mile. BRR also has experience tuning twin HPFP setups as well as the triple turbo setup Santjer Performance is developing. If I go down this high-output rabbit hole BRR is the obvious choice so I decided to make the switch now.

Can't wait see what this thing does when dialed in! In addition to power the fuel economy should also get a little bump.
 

Itsbrokeagain

Corporal
Jan 28, 2018
199
71
0
Strong Island
Ride
E70 X5d, E39 528iT, E46 325xi
FWIW my truck smoked for about a week or so after the install of the turbos. I had so much oil that was caught up in the exhaust and soaked in the muffler that it took several nights of hard runs in mexico to burn or blow most of it out. Going by your small turbo pics, that compressor seal was shot and all that carboned up stuff sitting in the housing is a tell tale sign.

I also replaced my Valve Cover entirely, I had assumed my diaphram was shot due to all the sludge buildup and it wasnt worth my time taking apart and cleaning, so I just bought a brand new one from getbmwparts.
 

TwinTurboWagon

Corporal
Nov 7, 2016
223
241
0
San Diego
FWIW my truck smoked for about a week or so after the install of the turbos. I had so much oil that was caught up in the exhaust and soaked in the muffler that it took several nights of hard runs in mexico to burn or blow most of it out. Going by your small turbo pics, that compressor seal was shot and all that carboned up stuff sitting in the housing is a tell tale sign.

I also replaced my Valve Cover entirely, I had assumed my diaphram was shot due to all the sludge buildup and it wasnt worth my time taking apart and cleaning, so I just bought a brand new one from getbmwparts.
Thanks for sharing. If the current smoking is just residual then that would be great but I did notice black oil coming from the base of the LP turbo (which could be an oil line) but also coming from the downpipe both at the V band and at the lower flange so it's coming from somewhere up stream.
 

Itsbrokeagain

Corporal
Jan 28, 2018
199
71
0
Strong Island
Ride
E70 X5d, E39 528iT, E46 325xi
im going to assume you replaced the feed and drain lines correct? My oil return lines were coked up solid, but judging by your head pictures your engine is spotless compared to mine.