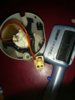
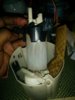
Yesterday I spent my first day off in 2 weeks installing my new fuel pump I bought on Black Friday. Precision Racework directions are very well thought out and the install is pretty straight forward. My only suggestion is that they include a list of what tools you need to complete the job.
You'll need a heat gun or your wife/sister/cousin/gf hair dryer.
3/8 ratchet
Dremel tool(Harbor Freight special works as well)
Wire stripper/crimper
Drill with various drill bit sizes. (The direction said you need a 7/64 bit but that's only for the initial hole you need to keep going up drill bit sizes otherwise you won't be able to install the push tab fitting s on the bucket.
Also extra zip ties and butt connectors just in case you screw up.
The only hard part of the install is taking apart the original fuel bucket but everything else is straight forward. Precision will install the pump in your bucket for $50 but I'm a cheap ass and that money can be spent on a Tinder date or beer lol.
In all I give the product 5/5!
Photos will be uploaded shortly!