Flex Fuel Box (N54) for MHD Installation
STEP 1: DISCCONNECT THE BATTERY
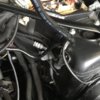
STEP 2: GAIN ACCESS TO DME BOX Remove the factory cabin air filter, covers, and factory cowl to gain access to the DME box on the passenger side of the engine bay closest to the firewall. Once these panels are removed you can take off the DME box cover by unclipping the front and rear clips that slide and releasing the ends of the right and left clips. The Flex Fuel Box will go in the DME box towards the front in one of the empty channels.
STEP 3: SMALL BLACK SUBCONNECTOR IN DRIVER SIDE DME CONNECTOR (X6002) Remove the two main connectors from the top of the DME. On the driver side connector carefully remove the small black sub-connector and locate pin 16. There should be a white wire with purple stripe in that location. Using a small pin tool or screw driver remove that wire and place a piece of heat shrink or electrical tape over the end. Install the female pin on the end of the Flex Fuel green wire (some may be a black wire with green heat shrink on the end) into location 16 of the small black sub-connector where you just removed the white wire with purple stripe. Slide the small black sub-connector back into place.
STEP 4: LONG BLACK SUBCONNECTOR IN PASSENGER SIDE DME CONNECTOR (X6005) Now take the long black sub-connector from the larger main DME connector that was removed from the DME in step 3. Pin location 25 should be empty. Insert the female pin on the end of the Flex Fuel orange wire (some may be a black wire with orange heat shrink on the end) into location 25 of the long black sub-connector. This should be an empty location, so you will not have to remove anything prior to installing the orange wire. Next, locate pin 10 on the same long black sub-connector. For those of you that have a Split Second Additional Injector Controller (AIC-6) you will want to disconnect the wire coming from the AIC-6. It will reconnect somewhere else later in this installation. For those of you who are not running port injection you can ignore the instructions regarding any connection to the AIC-6. There should be a yellow wire in pin 10. Using a small pin tool or screw driver remove that pin. Insert the female end of the jumper on the Flex Fuel yellow wire into the now empty location pin 10. Take the OE yellow wire you just removed, place the supplied piece of heat shrink over it, and connect it to the male end of the yellow jumper wire (opposite to the female connector you just installed into pin 10) and apply heat to the heat shrink that should now be covering the metal pins that you just connected.
STEP 5: OPTIONAL CONNECTION TO THE SPLIT SECOND AIC-6 As mentioned in step 4, if you are not running port injection you will not make this connection. Take a piece of heat shrink and put it over the end of the blue wire on the Flex Fuel harness. If you are running the AIC-6 for port injection then connect the end of the blue wire to the green wire coming out of the AIC-6 box.
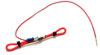
STEP 6: CONNECT THE RED POWER WIRE The RED wire coming out of the harness will go to the OEM green connector towards the front of the DME box that has two orange wires coming out of the top half of the plug and two coming out of the bottom half of the plug. Using the Posi-tap connect on the inner wire coming out of the bottom of that connector, connect the RED wire from the Flex Fuel Box harness. For additional instructions on installing a POSI-TAP go to the following link: http://www.posi-products.com/instructions1.html
STEP 7: CONNECT THE GROUND WIRE Run the black wire from the Flex Fuel Harness that has the ground loop terminal on the end of it out of the DME box and over near the windshield fluid fill neck. You will see a small stud with a 10mm nut on it that is one of the grounding points for the engine harness. Remove the nut and place the ground loop terminal onto the stud with any other grounds you may already have there. Be careful to arrange all grounds on that stud appropriately and now place the nut back on and tighten to spec.
STEP 8: CONNECT TO THE ETHANOL SENSOR There are two common places where the ethanol sensor can be located. The first is in the engine bay on the driver side near where the flexible fuel feed line connects to the hard feed line. The second is on the underside of the car almost directly under the driver seat (and for our friends across the pond – under the passenger seat). To begin, take the 3-wire grey conduit and run it out of the DME box and securely across the firewall to the driver side of the engine bay. For those of you who mounted the ethanol sensor in the engine bay go ahead and make the connection. For the people who mounted it under the car, run the conduit down the tunnel with the feed line and connect it to the sensor.