Single Turbo Setup Can't Reach Wastegate Pressure

Arrtus

Private
Apr 24, 2021
32
4
0
Hey guys,

I originally had posted this in the N54Tech forum but got little to no help. I'm really stuck on and can't understand what is causing this problem.

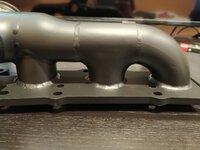
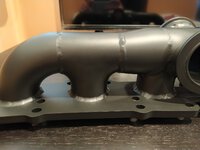
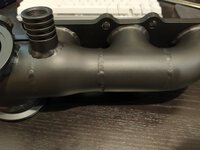
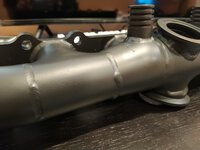
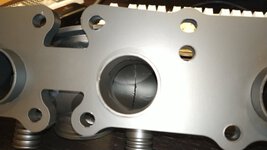
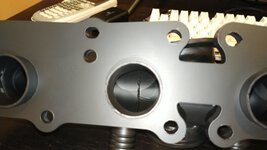
This is a brand new DR700 setup and ever since making the swap, I am unable to reach more than ~9 psi (14 psi spring). The car is obviously way underboosting and I have no idea why. All the vacuum lines have been checked and are brand new. I have pressure tested from the turbo output all the way to the charge pipe and have found no issues. I also tested the compressor housing side of the turbo (and intake) and it did not leak whatsoever. I went through all the V-band connections and everything is on correctly and tightened to the max.

Symptoms: The car sounds different. I don't know if it's because of the single turbo but when going on WOT it doesn't sound like it's spooling. It's also very loud, like it just changes sound as soon as it starts building pressure.

With other maps, the wastegate (I think?) starts pulsing and sounding like it's hitting a rev limiter or 2-step while it's on WOT. It's most likely because of the mac that it's switching the air into the wastegate but it's not able to hold pressure or something. With maps aiming at higher PSI, it reaches ~12 PSI. What would cause the wastegate to do this? Can it be defective? It's a turbosmart gen V 45mm. I also checked the wastegate by putting some pressure on it and I can hear it open and closing. The MAC solenoid is also working just fine (which doesn't matter since it's not in use in map 0 and the problem is still there).

Log of a map 0 pull attached. Any advice or suggestions would be really appreciated!
 

Attachments

  • P30_M0_R1_210424_160558.csv
    18.8 KB · Views: 123

shushikiary

Sergeant
Jun 4, 2018
304
173
0
Ride
335xi
Stainless tends to be harder, and therefore more brittle (more likely to crack) than "normal" steel or the like.

During welding if too much heat is applied to the weld it will often make the weld its self very brittle, or the HAZ (heat affected zone). Another thing that can cause cracks like this is called hydrogen embrittlement, this is when hydrogen gets into the metal while it is cooling or during the welding. The protection for this is proper shielding gas. On a stick welding setup where the burning of the flux of the rod makes the gas the shielding gas is under high pressure and works well even outdoors (and a low hydrogen stick is used (any stick ending in 18). When doing tig or mig however if there is even a puff of wind the shielding gas can be blown away causing issues, flux core is NOT advised when welding stainless.

Because stainless is already so hard, when welding thin metal it is important to cover the back side of the weld with shielding gas due to the embrittlement problems. This is called a "back purge". It's likely that during the welding process they either did not use a back purge, got too hot, or had a fan or something in the shop (or the shop door open) which then blew away the shielding gas.

Tisk tisk on the welder who did that work if any of that is true.


In any case, do you know who makes an awesome bottom mount kit that doesn't have these problems, is twin scroll and has shown awesome numbers and offers the same turbo you're already using? Speedtech.... I'd suggest you give them a try if you're done with the doc race kit.
 
Last edited:
  • Like
Reactions: Arrtus

martymil

Major General
Sep 6, 2017
3,331
1,906
0
Down Under
Ride
S65 1m
We back purge all our welded exhaust manifolds where extreme heat will be a factor and it cost a lot of money that's the difference between cheap kits
and ones that have been done properly.

People don't understand how much money and r&d goes into something like this, all they do is bitch about the final price.

If all you want is cheap expect the manufacturer to try and cost cut in one way or another.
 
  • Like
Reactions: Arrtus

fmorelli

Lieutenant General
Staff member
Aug 11, 2017
3,748
3,592
0
57
Virginia
Ride
E89 Z4 35i, F10 535d
Yes ... and back purging with argon is run of the mill knowledge to anyone that knows what they are doing - that should be a given on that manifold. My twin turbo outlets are custom made from stainless ... and of course are back purged.

Wondering if these guys had a bad batch...

I'm sure you are frustrated. Stick with it - you are almost out of the woods it seems.
 
  • Like
Reactions: Arrtus

Arrtus

Private
Apr 24, 2021
32
4
0
I would not be surprised if a bad first batch went out. The kits were delayed multiple times and could have been rushed to get them out.

I know DocRace is more than capable of making quality products. I didn't mean to make it sound like their company isn't up to par with other kits by any means.

By the way, @Steve135i, I also noticed I have the same thin crack as well at the center location you posted a picture of. If your manifold is not installed yet, I would highly recommend you get the other welds maybe re-done/reinforced or something. There's no guarantee that the rest of the welds are going to hold up. But If you already installed everything, I hope your manifold doesn't succumb to the same failure points as mine did.
 

Steve135i

Specialist
Nov 16, 2020
51
45
0
New Jersey
Ride
08 135i e88
I would not be surprised if a bad first batch went out. The kits were delayed multiple times and could have been rushed to get them out.

I know DocRace is more than capable of making quality products. I didn't mean to make it sound like their company isn't up to par with other kits by any means.

By the way, @Steve135i, I also noticed I have the same thin crack as well at the center location you posted a picture of. If your manifold is not installed yet, I would highly recommend you get the other welds maybe re-done/reinforced or something. There's no guarantee that the rest of the welds are going to hold up. But If you already installed everything, I hope your manifold doesn't succumb to the same failure points as mine did.
Well i also bought this kit with the thought that doc race was the company you want to get a n54 ST from. Saving money had nothing to do with it. By the time i added the gen2 turbo and open dump option and ceramic coating i spent as much as any other kit i could have bought. Except ces lol. I was like #3 on kit preorders. The guy in front of me and the guy behind me also had cracked manifolds. Im guessing a bad batch. Which im sure was not the way he wanted these kits to hit the market. I did see when putting it together there was some pieces that were not up to par. I bought my own oil feed line, i dbl wrapped the oil drain and the waterpipe to radiator hose. Changed all the worm clamps to tbolt spring clamps. Changed the oil drain -an on the turbo to a better one. I see they were trying to make a price point, and wasnt worried about it. Its a good kit. And i will move forward with it. As far as welding the manifold, i have a really good welder down the block from me. He told me they didnt purge the welds like mentioned above. I asked if we could grind out all of them and re-weld but he said "if it aint broke dont fix it" so i only did the one that was cracked. Doc race will stand behind their products and as i said and has a better welded version already that doesnt have the center seam that i could have got in place of this one. And a cast version in design. But at the time i couldnt wait for shipping. Im moving soon and needed to get the engine back in the car.
I put this kit in first time with subframe in, was pretty quick and easy, second time with subframe out because i spun a waterpipe bolt and had a small drip that bugged me, I needed the extra room to tap the hole. Now i put it on a 3rd time with motor out. I will keep an eye on it and see if any more cracks start. Im hoping it lasts until im done building the motor im working on. But if not its a pretty easy removal. Just take dp off. Drop turbo off vband, let it sit on waterpipe. Take off wastegate and dump pipe and every bolt is accessible. I will update if i have any further cracks.
Good luck to you. Its a new product and has some bugs to work out. But i think once the manifold is corrected we got a good kit at a good price. Stick with it and give it a shot.
 
  • Like
Reactions: Arrtus

Arrtus

Private
Apr 24, 2021
32
4
0
Today I received a new turbo manifold from DocRace and I wanted to post some pictures of the welds to get some feedback/opinions. The manifold looks better in terms of tube spacing to bolt holes which was a problem before and required cutting bolts to fit.

I am uncertain if the welds are done correctly this time which is why I'm posting. They look similar to the previous manifold; maybe a little cleaner though. Some welds seem a little inconsistent when compared to each other; some being thicker and others thinner. I don't see any hair-like marks which is great. However, I'm still feeling a little skeptical. Is there any way to tell if these welds are going to hold?

@fmorelli @martymil @shushikiary
 

Attachments

  • IMG_20210825_174617.jpg
    IMG_20210825_174617.jpg
    239.3 KB · Views: 139
  • IMG_20210825_174620.jpg
    IMG_20210825_174620.jpg
    206.5 KB · Views: 79
  • IMG_20210825_174629.jpg
    IMG_20210825_174629.jpg
    206.6 KB · Views: 75
  • IMG_20210825_174640.jpg
    IMG_20210825_174640.jpg
    193.6 KB · Views: 79
  • IMG_20210825_174722.jpg
    IMG_20210825_174722.jpg
    126.5 KB · Views: 78
  • IMG_20210825_174731.jpg
    IMG_20210825_174731.jpg
    124.3 KB · Views: 126

Steve135i

Specialist
Nov 16, 2020
51
45
0
New Jersey
Ride
08 135i e88
That actually looks alot better than my v1 manifold. You can't see any weld on the inside on mine. Just the stainless seams. I'm pulling my motor earlier than expected so I'm gonna try to send mine back and get one like that. Mine was also pretty warped and took some creative wrenching to get it to lay flat again. I don't want to try it a third time. Best of luck with this.
Oh btw when I was doing logs all came up 4lbs under boost. I did boost test and had no leaks except the tinyest one by chargepipe. I have no cracks in my manifold. When I told doc race this he told me this was normal and the test car for the dr700 was also 4lbs underboost. Said I should just turn the boost up lol.And I speak with 2 more guys who have dr700 who are also boosting 3-4lbs under boost. And one guy who is boosting just fine but he has a newer manifold.
 

Arrtus

Private
Apr 24, 2021
32
4
0
That actually looks alot better than my v1 manifold. You can't see any weld on the inside on mine. Just the stainless seams. I'm pulling my motor earlier than expected so I'm gonna try to send mine back and get one like that. Mine was also pretty warped and took some creative wrenching to get it to lay flat again. I don't want to try it a third time. Best of luck with this.
Oh btw when I was doing logs all came up 4lbs under boost. I did boost test and had no leaks except the tinyest one by chargepipe. I have no cracks in my manifold. When I told doc race this he told me this was normal and the test car for the dr700 was also 4lbs underboost. Said I should just turn the boost up lol.And I speak with 2 more guys who have dr700 who are also boosting 3-4lbs under boost. And one guy who is boosting just fine but he has a newer manifold.
Hm, strange to hear about the underboost. Did the turbo also lag a lot before hitting boost or was it spooling fine?

Going to try to get the car up and running by this Sunday. DR said he was going to include new gaskets, nuts and bolts but I guess he forgot. Ended up ordering them from FCP with their fastest shipping 'cause I'm super impatient lol. I'll keep you updated with how the new manifold performs.
 

shushikiary

Sergeant
Jun 4, 2018
304
173
0
Ride
335xi
I agree the welds look much better, though with the paint/coating on it it's a little hard to tell. The welds look like they may have been done by TIG, but who ever did the tig welding had an interesting dabbing technique that is not what I would call "perfect". They almost look like stick welds, as the starts/ends of each bead are kind of interesting shaped indents or bumps... with the coating/paint on there it's hard to tell like I said.

The only ways to know if the welds are truly good would be to x-ray the thing, or to test it and see if it fails.

The under-boost thing confuses me... it will totally depend on how you're doing your boost control. If you have a full feed back loop with enough PID gain, you'd see a difference in WGDC rather than a difference in boost. If you're using a fixed WGDC with no closed loop involved (no PID), then sure you'd see a drop, or if your WGDC tables in the DME are not setup to allow enough extra WGDC over the base table to get to target. Even then, you should always at least spring pressure as the waste gate won't open until you've hit spring pressure with zero WGDC. If you're using a EBC, then it will totally depend on what settings you have it set to.
 

Arrtus

Private
Apr 24, 2021
32
4
0
I agree the welds look much better, though with the paint/coating on it it's a little hard to tell. The welds look like they may have been done by TIG, but who ever did the tig welding had an interesting dabbing technique that is not what I would call "perfect". They almost look like stick welds, as the starts/ends of each bead are kind of interesting shaped indents or bumps... with the coating/paint on there it's hard to tell like I said.

The only ways to know if the welds are truly good would be to x-ray the thing, or to test it and see if it fails.

The under-boost thing confuses me... it will totally depend on how you're doing your boost control. If you have a full feed back loop with enough PID gain, you'd see a difference in WGDC rather than a difference in boost. If you're using a fixed WGDC with no closed loop involved (no PID), then sure you'd see a drop, or if your WGDC tables in the DME are not setup to allow enough extra WGDC over the base table to get to target. Even then, you should always at least spring pressure as the waste gate won't open until you've hit spring pressure with zero WGDC. If you're using a EBC, then it will totally depend on what settings you have it set to.

Thank you for your input. I guess only time will tell with these welds.

Funny enough, I did take a screenshot of an IG post DR had made with their latest manifolds pre-coat. It's not a close-up but may give a rough idea of how much the welds were heated up if that helps any?
 

Attachments

  • DR700 manifolds.PNG
    DR700 manifolds.PNG
    1.9 MB · Views: 160

shushikiary

Sergeant
Jun 4, 2018
304
173
0
Ride
335xi
Yes actually that gives a much better idea. When the metal discolors like you see there that means it got really hot. Purple decolorization means it got pretty damn hot, but that's expected some, just not gobs of it. So by looking at the color on the metal you can see where the heat concentrated, and then know where more heat was put in instead of less.

You can tell exactly where the start/end of the weld was by the color too, on the bead its self the middle section that is colored was the middle of the bead, the start and end have no decolorization because they are much colder. You can see how much heat went into the HAZ of each of the welds as well, and even get an idea of which direction was up when they did the weld.

Notice the bottom furthest right bolt hole is purple on almost every one? That means it was likely up in the air when they welded that tube on, as heat likes to rise, just like convection in air, even if it's in the metal you're welding. This is why vertical up welding can be so hard and you need to turn the current down so much, the heat concentrates right in front of you and you can blow through metal like paper if you're not careful (especially stick welding 7018).

Stainless doesn't flow heat anywhere near as well as regular steel does, who is no where near as good as aluminum or copper. That's why welding aluminum is SO DAMN HARD, because all your heat flows away fast, but if you pour a ton of heat into it then you just blow it away as it melts way to easy, so proper heat control is very important when welding aluminum, which is why TIG is the preferred method, or spool gun MIG, but spool gun MIG on aluminum makes it look like you just threw metal everywhere if you're not super careful.

Anyways, same idea applies to stainless, the heat will concentrate because it doesn't flow well, but you need enough of it that you melt it, but not too much. You can see that the HAZ did not spread very far from the weld, for exactly the reason that stainless doesn't flow heat away well.

From the picture it LOOKS like they didn't do a root pass and then fill pass like you would on stainless pipe normally. Normally you'd do a back purge on the root pass and do the root pass as stick or TIG (with the proper stock/rod), then you could come back and do the fill pass with MIG, but that's on thicker material. On thinner stuff like this you can get away without doing the root pass, but you should still back purge. No way to tell here if they back purged or not, but for sure these look like single pass welds and looks like they did not do a root pass - acceptable given the thinness of the metal here.

The welds, from what you've shown, look like they "should" be ok, though they do look like they are running a little hot, but you kind of want to run a little hot when doing single pass. How brittle the welds will be will also depend on what rod they chose as their fill rod, you can get different hardness rods to match different stainless alloys.

I wish the photo was a little closer, but from the looks of it I'm more convinced its TIG, and that they used a "run over rod" technique rather than "dab". People will have their own opinions, but from x-rays I've seen, dab tends to have better heat control and produce a better weld. When you run over the rod with no real dab the puddle gets cold fast, and to make up for that you generally have to put your foot down on the pedal (aka give it more current), which would explain exactly what we see here, and why the welds don't look like a "stack of dimes" but in some places they kind of start to. If you don't put enough heat in you get "cold lap" where the weld is kind of more like a solder joint than a weld, the two pieces of metal are not "one" but "3" (left piece, right piece, and your "weld"), so it's all a fine balance. Some people can get x-ray good welds with lay wire and yet can't with "dab" while others are the opposite, some say dab doesn't work for root pass, others say you can't do a proper root pass without it.... you get the picture. Reality is only experience tells a welder if what he's doing works or not, and once they find what ever works - then keep doing it.

That would be my educated guess from what you've shown. I could be wrong.

I think you'll be ok, but only slapping it on and putting some heat through it for a few thousand miles will really tell you.
 
Last edited:

dubgtr

New Member
Nov 4, 2021
9
0
0
I'm not trying to bring a dead thread back to life by accident lol. I was hoping Arrtus has an update with that V2 manifold. Has is cracked yet? How long have you had it installed? Do you plan on trying to swap for the cast manifold?
 

Arrtus

Private
Apr 24, 2021
32
4
0
I'm not trying to bring a dead thread back to life by accident lol. I was hoping Arrtus has an update with that V2 manifold. Has is cracked yet? How long have you had it installed? Do you plan on trying to swap for the cast manifold?

I had the kit installed on the car for about 500 miles or so. I ended up selling the car last Saturday so I can't really say if it was good or bad.

I was talking to someone from FB that reached out to me regarding the kit after he saw my marketplace post. He said his buddy has the same kit and he also had problems with the welds cracking. He opted for the cast version and that one cracked as well apparently. He sent me pictures of it and it looked absolutely horrendous; like it was torn down the flanges.

Overall, if I was to do it again, I would stay away from DR or go with their top mount at the very least. This kit had been nothing but a headache for me and ruined my desire to work on or even drive my car.

By the way, I have an extra brand new V2 manifold if you want to try your luck. :laughing:
 
  • Wow
Reactions: Torgus

Torgus

Brigadier General
Nov 6, 2016
2,671
2,194
0
Boston
Ride
ACF 6466 E92 + METH
I had the kit installed on the car for about 500 miles or so. I ended up selling the car last Saturday so I can't really say if it was good or bad.

I was talking to someone from FB that reached out to me regarding the kit after he saw my marketplace post. He said his buddy has the same kit and he also had problems with the welds cracking. He opted for the cast version and that one cracked as well apparently. He sent me pictures of it and it looked absolutely horrendous; like it was torn down the flanges.

Overall, if I was to do it again, I would stay away from DR or go with their top mount at the very least. This kit had been nothing but a headache for me and ruined my desire to work on or even drive my car.

By the way, I have an extra brand new V2 manifold if you want to try your luck. :laughing:

Share the pictures if you can!
 

dubgtr

New Member
Nov 4, 2021
9
0
0
WHAA that's crazy. Now I don't know what to think. I have the whole kit and a V2 manifold arriving at my house tomorrow, new. I don't know whether to try the V2 or send it back for the cast now or what
 

dubgtr

New Member
Nov 4, 2021
9
0
0
By the way, I have an extra brand new V2 manifold if you want to try your luck. :laughing:
I may take you up on that. I'll pay for shipping and what not, let me look at mine and tell you what I think. I just know that since I bought the kit from someone else, DR told me that it would be $500 to swap the manifold out with the cast one. They said the lifetime warranty only applies to the original owner, EVEN though the kit is brand new. Pfff