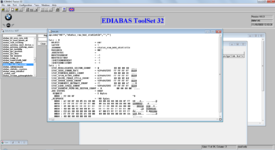
To my knowledge this hasn't been done publicly yet. It's possible on EVO units however, NBT refuses to mount SSDs.
I've achieved this swap by patching the srv-hddmgr binary running on HU-Intel.
Based on previous comments on other forums, the assumption was that SMART variables were what caused the NBT to refuse SSDs. There's actually a temperature check function which always returns an error on my SSD.
For reference, the SSD I used is an Integral 240GB. Literally the cheapest drive I could find https://www.integralmemory.com/product/c-series-sata-iii-2-5-ssd/.
Warning! The following can lead to a brick which requires the EMMC to be repaired. I will describe this in a separate post. Execute the commands that replace the binary carefully. The startup script which loads all the programs is very strict at will restart the system if srv-hddmgr crashes potentially leading to a boot loop.
I've achieved this swap by patching the srv-hddmgr binary running on HU-Intel.
Based on previous comments on other forums, the assumption was that SMART variables were what caused the NBT to refuse SSDs. There's actually a temperature check function which always returns an error on my SSD.
Code:
void FUN_0807af78(void)

{
  FUN_0807ae43();                                    // Bypass this function call with NOPs
  return;
}

FUN_0807ae43() makes the calls for readtemp_direct and will return "__errnum". For some reason on SSDs this has issues and leads to the disk being unmounted.


A trivial patch changes 5 bytes at 0x807AF7F from "E9 BF FE FF FF" to "90 90 90 90 90".
For reference, the SSD I used is an Integral 240GB. Literally the cheapest drive I could find https://www.integralmemory.com/product/c-series-sata-iii-2-5-ssd/.
Warning! The following can lead to a brick which requires the EMMC to be repaired. I will describe this in a separate post. Execute the commands that replace the binary carefully. The startup script which loads all the programs is very strict at will restart the system if srv-hddmgr crashes potentially leading to a boot loop.
- Using serial access enable SSH https://www.spoolstreet.com/threads/serial-telnet-and-ssh.9172/.
- The original hard drive needs to be unlocked so that it can be imaged:
- Run and take a note of the values:
- adjinfo --get=E2P.Networking.Eth0MacAddr
- adjinfo --get=E2P.Networking.Bt0Addr
- adjinfo --get=E2P.ProdLogistic.SerialNo
- Copy complete hddsecurity + libs to a USB drive in a folder called "hddsec". Plug the drive into NBT's USB1 slot. Run:
- mkdir /fs/sda1/work
- cp /fs/usb0/hddsec/* /fs/sda1/work
- cd /fs/sda1/work && chmod +x hddsecurity
- ./hddsecurity -d **Eth0MacAddr**,**Bt0Addr**,**SerialNo** (replace the **s and values with data from adjinfo)
- Run and take a note of the values:
- Remove the drive and make an image of it. I merely copied my drive. I did not bother with expanding the media partition since its capacity doesn't get displayed properly. Restore the image to the SSD.
- Start NBT with the SSD installed.
- Copy srv-hddmgr to the root of a USB drive. Plug the drive into NBT's USB1 slot. Run:
-
Code:
mount -uw /fs/sda0 && \ mv /fs/usb0/srv-hddmgr /opt/sys/bin/ && \ chmod 0775 /opt/sys/bin/srv-hddmgr && \ sleep 5 && \ mount -ur /fs/sda0 && OnOffDSICommander appreset - Unit will restart and the SSD should now be mounted.
Attachments
Last edited:


