

First and foremost thank you so much to @doublespaces for setting up these raffles for the spoolstreet community and @PRECISON RACEWORKS for generously offering up a Stage 2 LPFP! Rob at PR has been absolutely amazing throughout this whole process. I've rarely come across customer service and care from a company or manufacturer like I have from Rob, and I've worked in the Customer Service industry for many years lol. I was impressed by the services received, from rectifying a mistake (he forgot about this raffle and express shipped me free of charge  ), to answering any of my dumb questions almost instantly with no wait. Not to mention that PR's products are top quality! Definitely looking forward to future products from PR.
(There is also the option for $50 to have PR assemble the pump I believe)
There are great DIY's from PR themselves, Fuel-It, and some others so I won't make one of those. I'll just post the links:
DIY From PR
(http://www.precisionraceworks.com/index.php?route=product/category&path=57
Tools Needed - Thanks @Abacus38 for the DIY (https://bmw.spoolstreet.com/threads/precision-racework-lpfp-install-stage-2.925/)
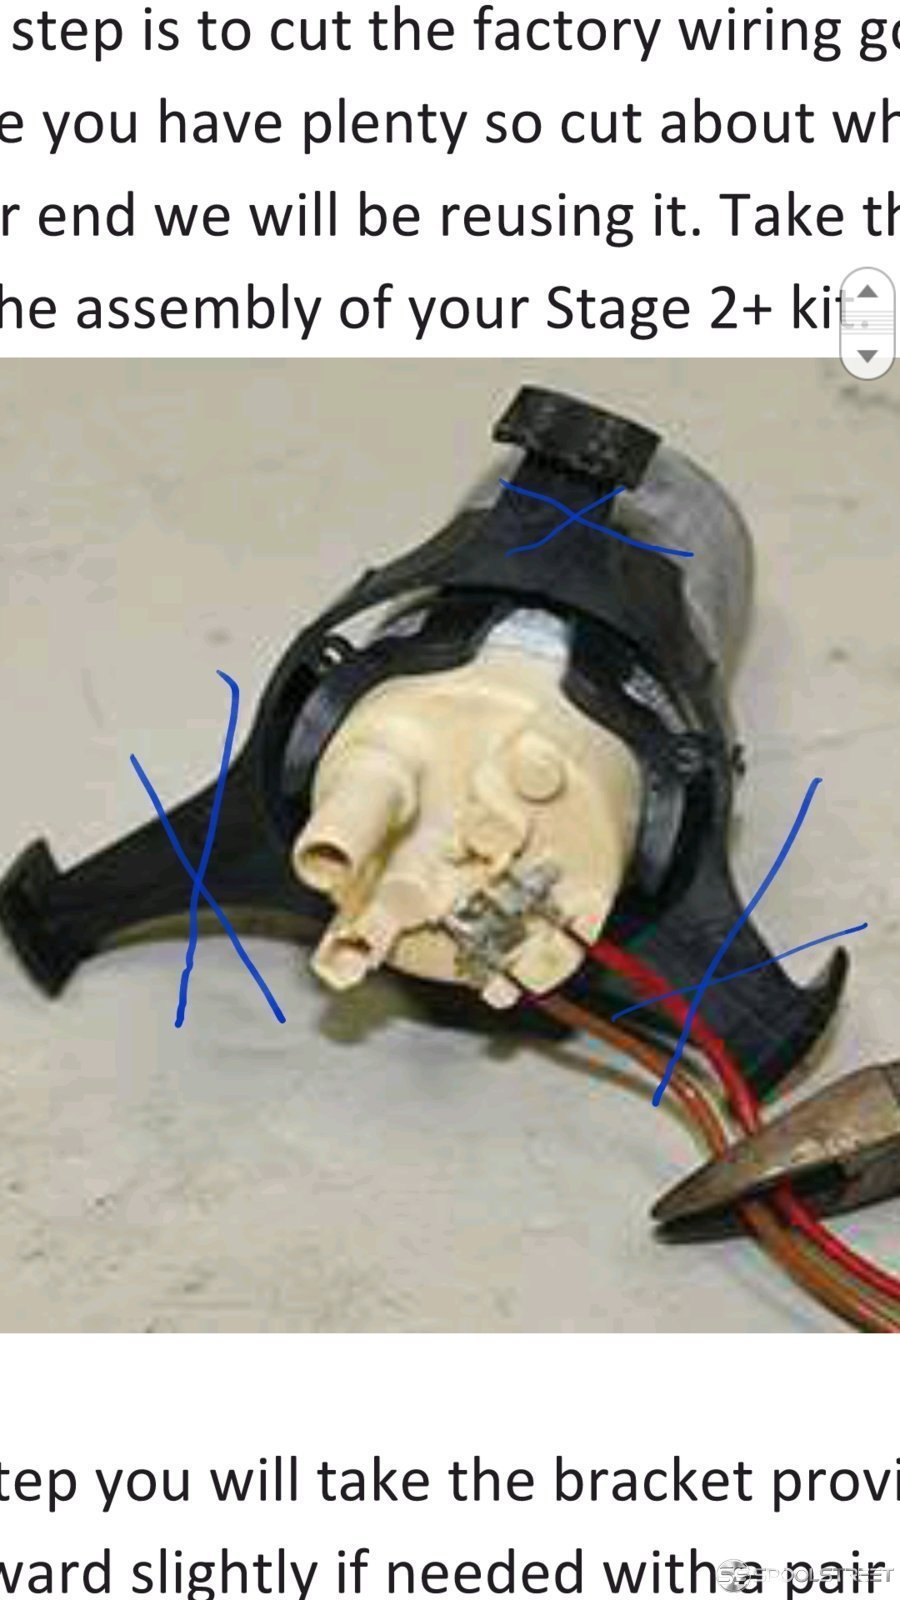
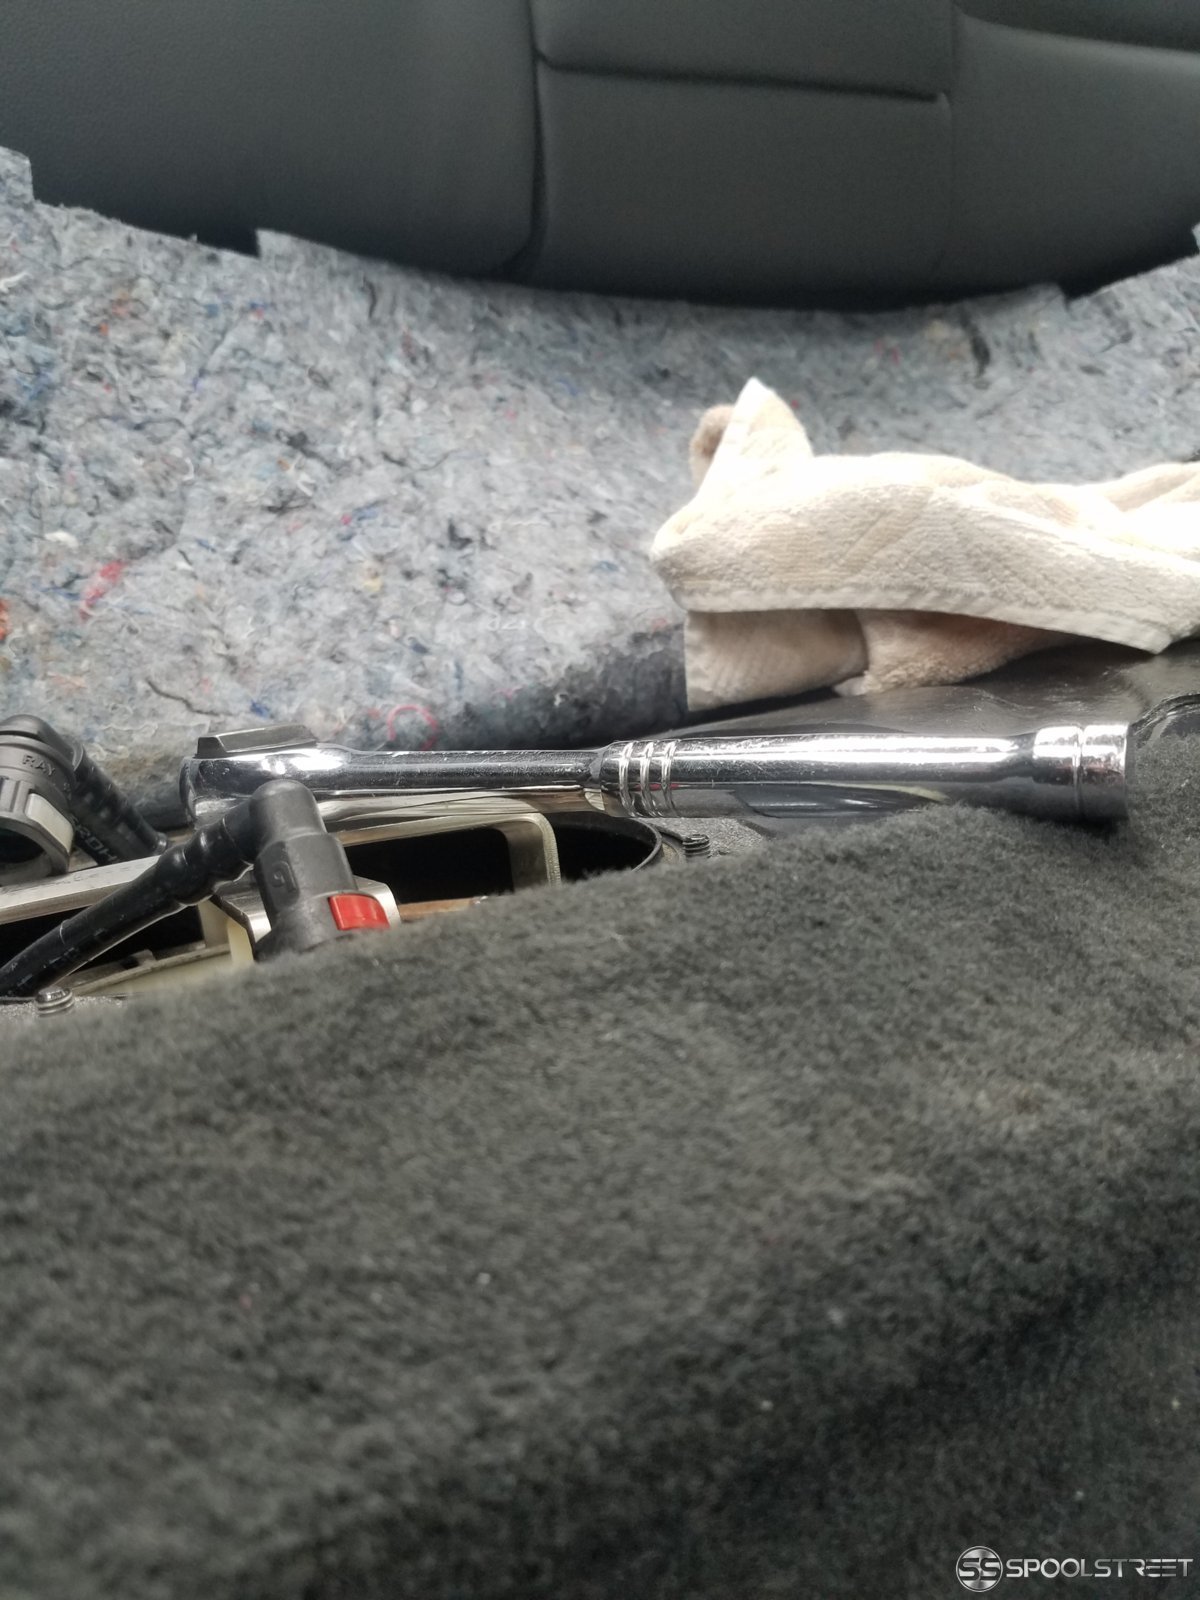
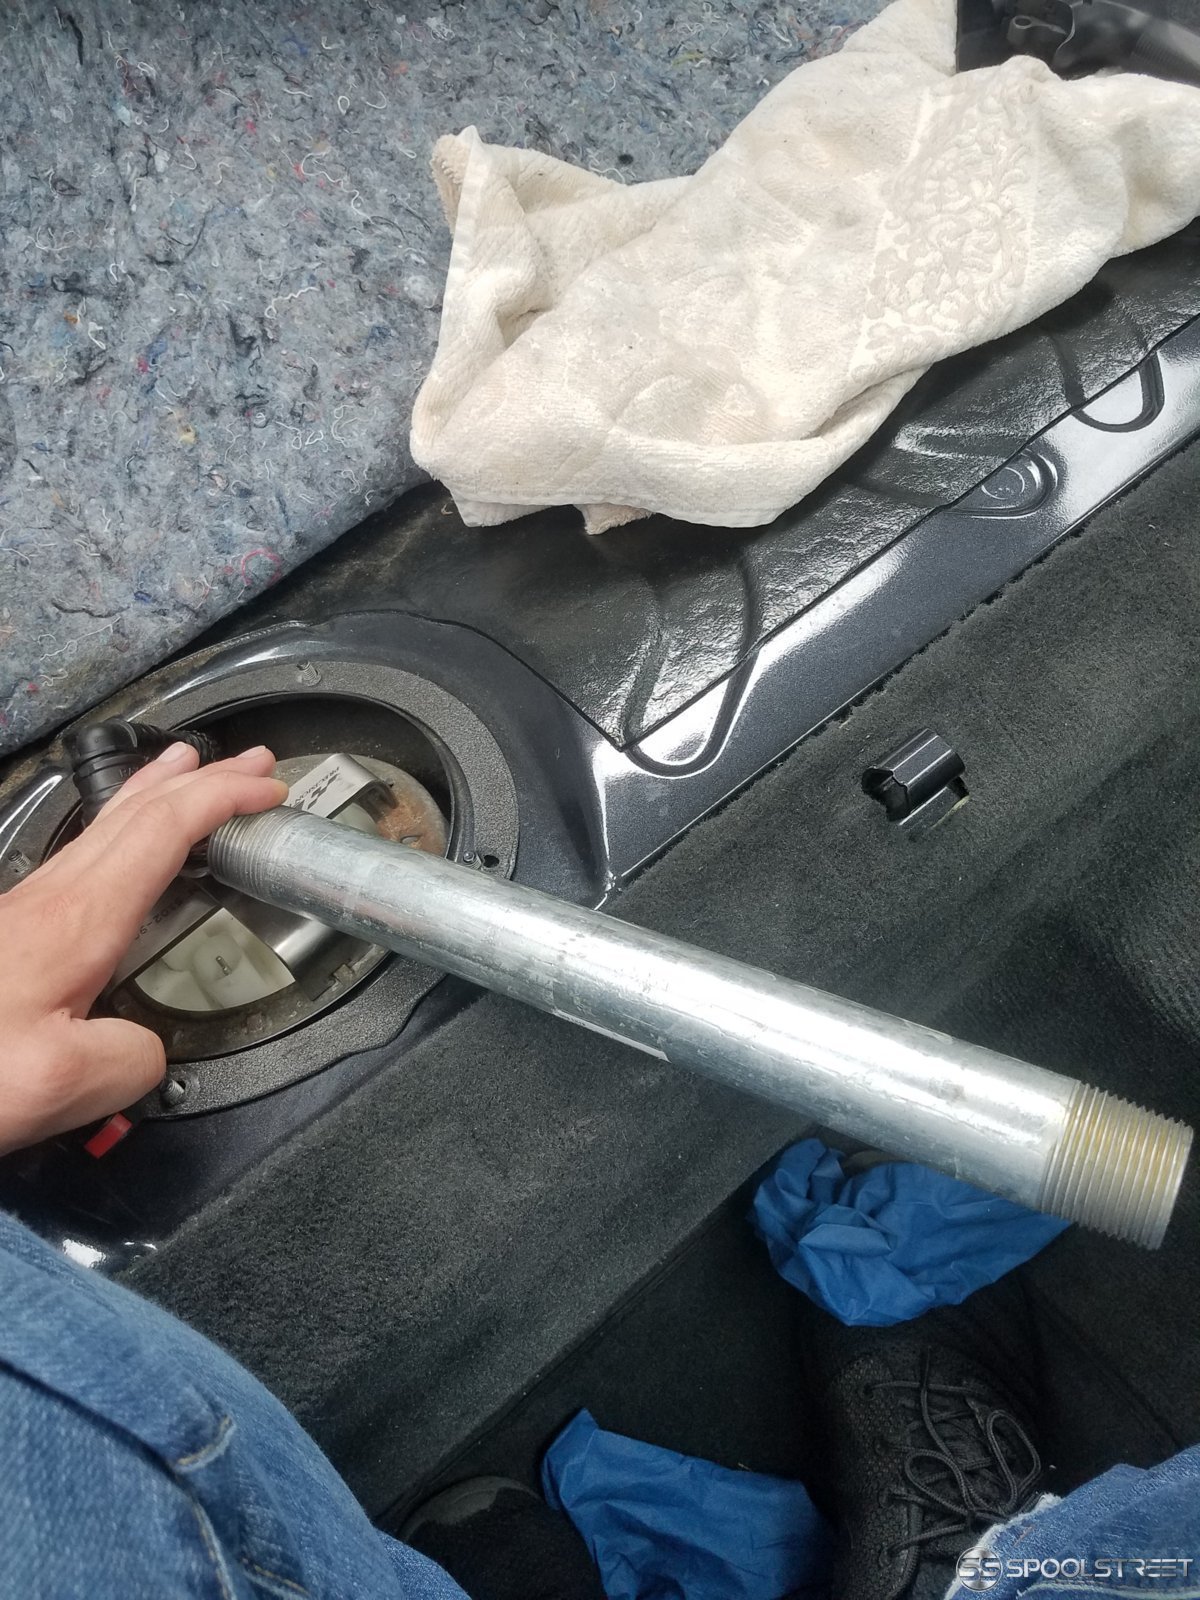
- 3/8 ratchet - Dremel tool - Wire stripper - Wire Crimper - Drill with various drill bit sizes. (The direction said you need a 7/64 bit but that's only for the initial hole you need to keep going up drill bit sizes otherwise you won't be able to install the push tab fittings on the bucket - Also extra zip ties and butt connectors just in case you screw up - Breaker/Cheater Pipe extra leverage for fuel lock ring
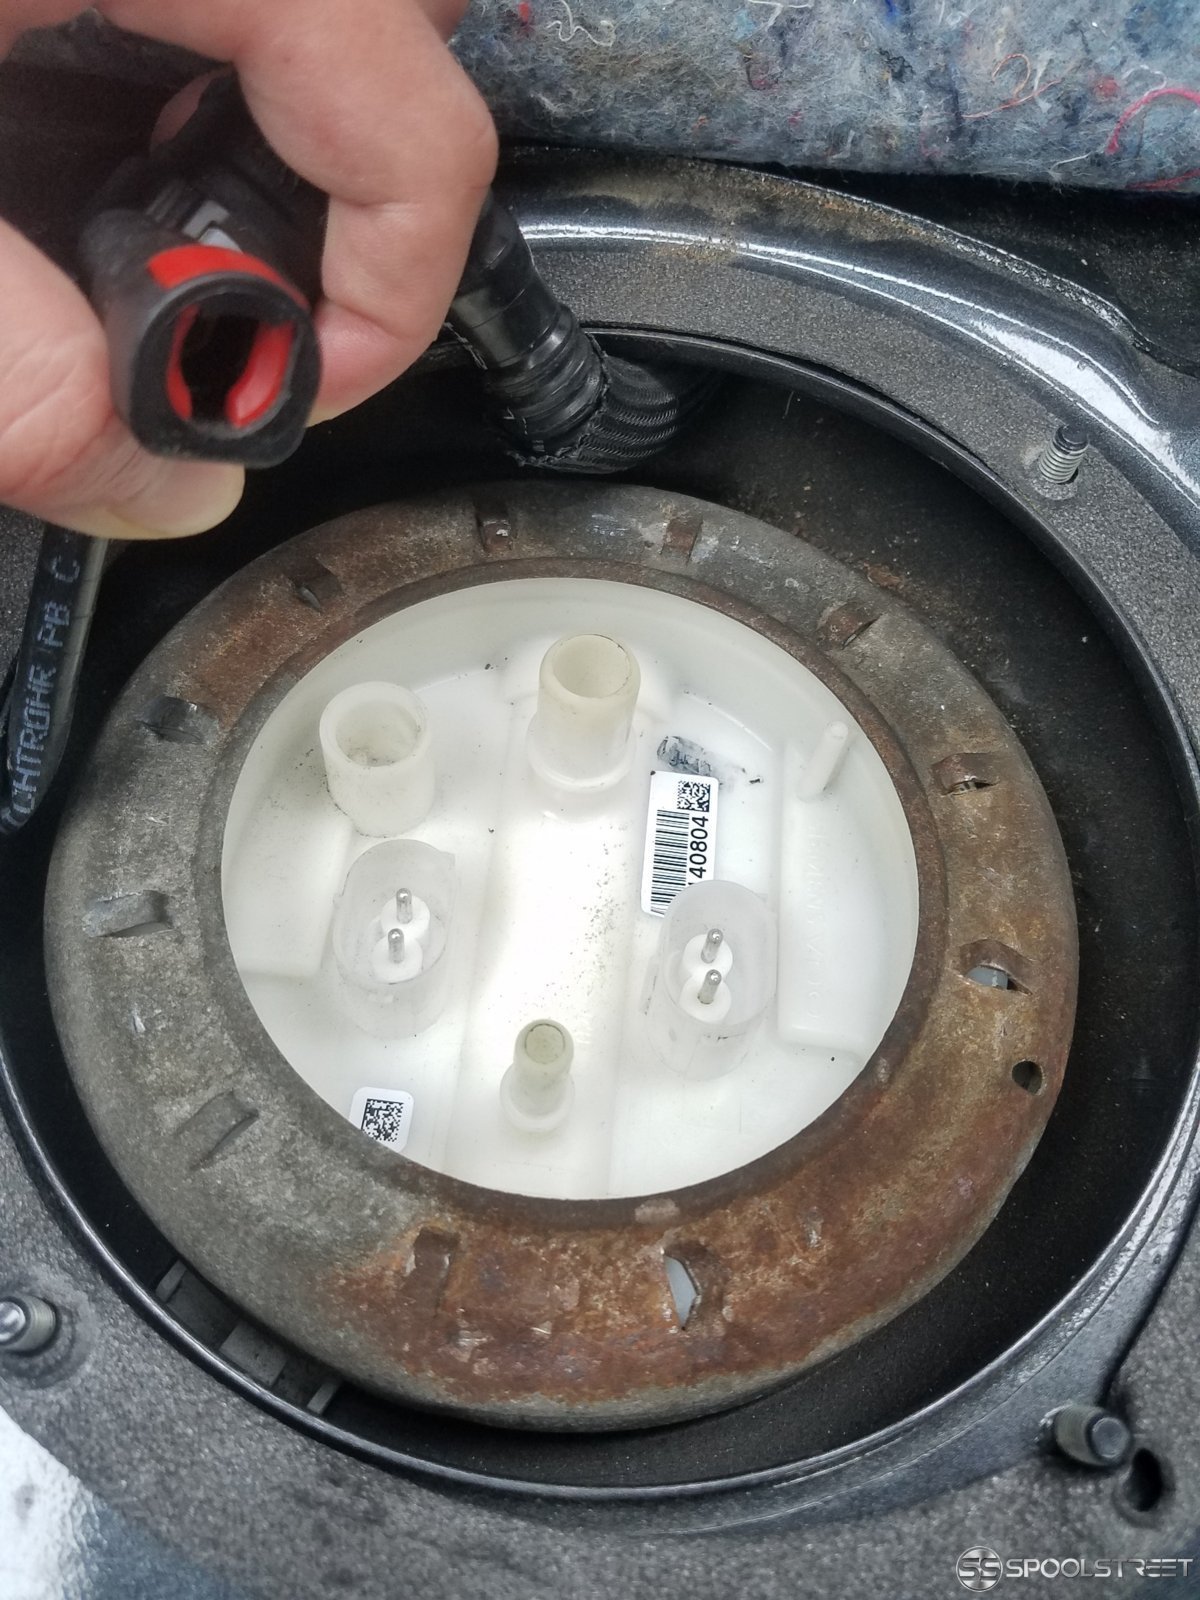
The removal of the stock LPFP was fairly simple with the difficulty being 5/10 from a person who is in between a novice and an amateur mechanic. The only difficulties were personal, such as my rusted lock ring. A couple tips though:
- When loosening the lock ring, I had to use a pipe over my ratchet because there was little to no leverage with my size ratchet
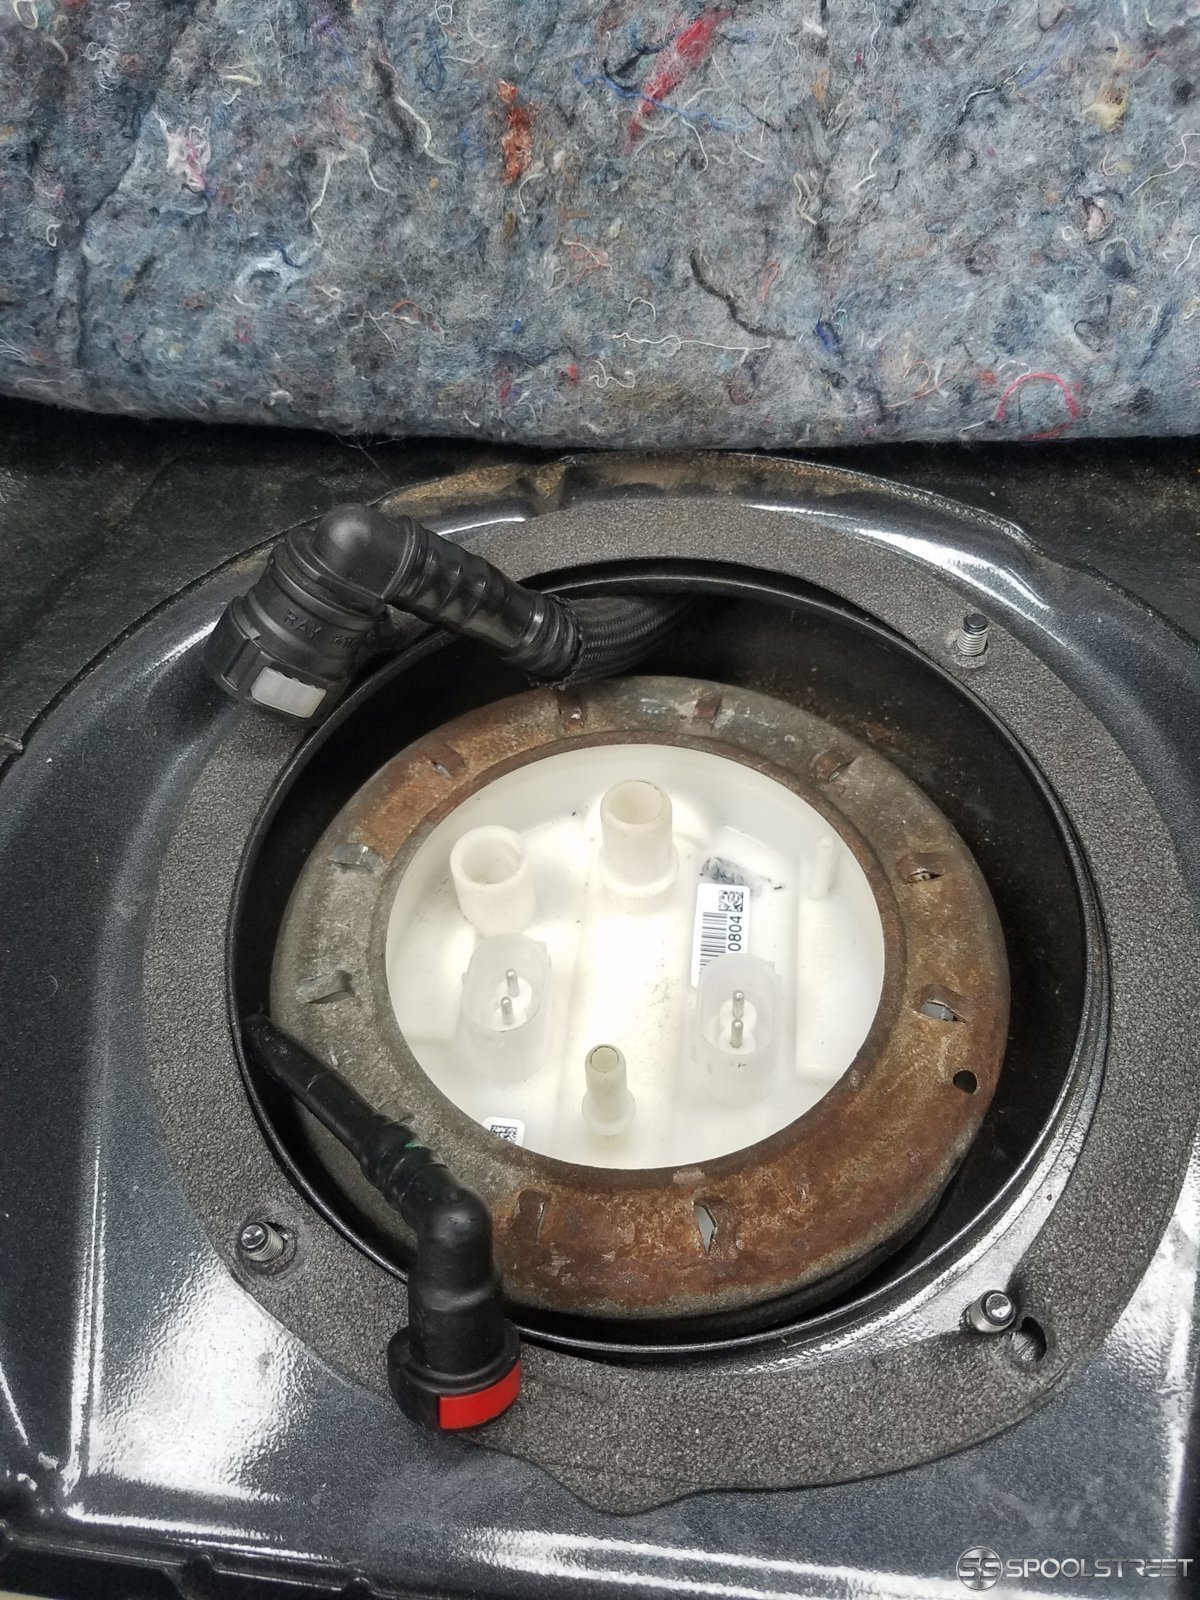
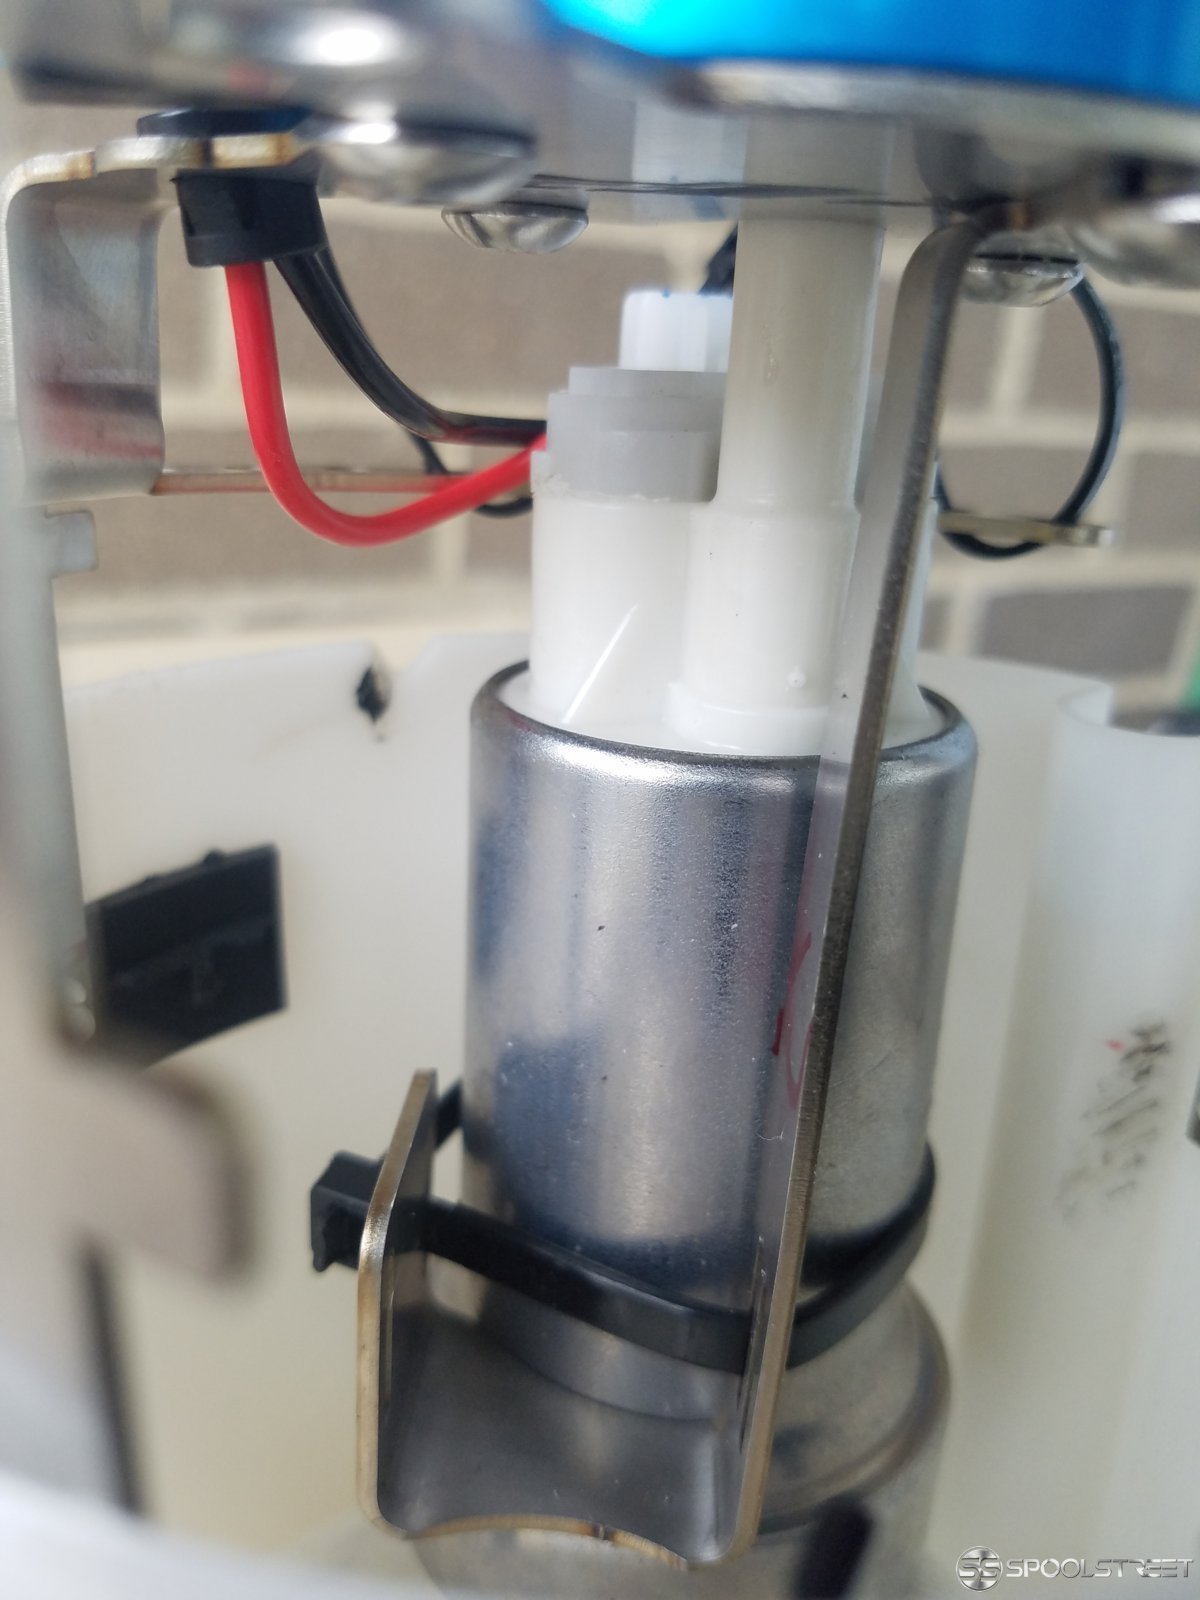
- Also when removing the lock ring, try and orient the 2 vent lines like in the pics above or in the Fuel-It video. When you turn the lock ring, it will catch on the lines and you could possibly damage them. These 2 vent lines are a HUGE PITA if you let them just hang in the middle and get in the way of everything so just position them to the side as best as you can.
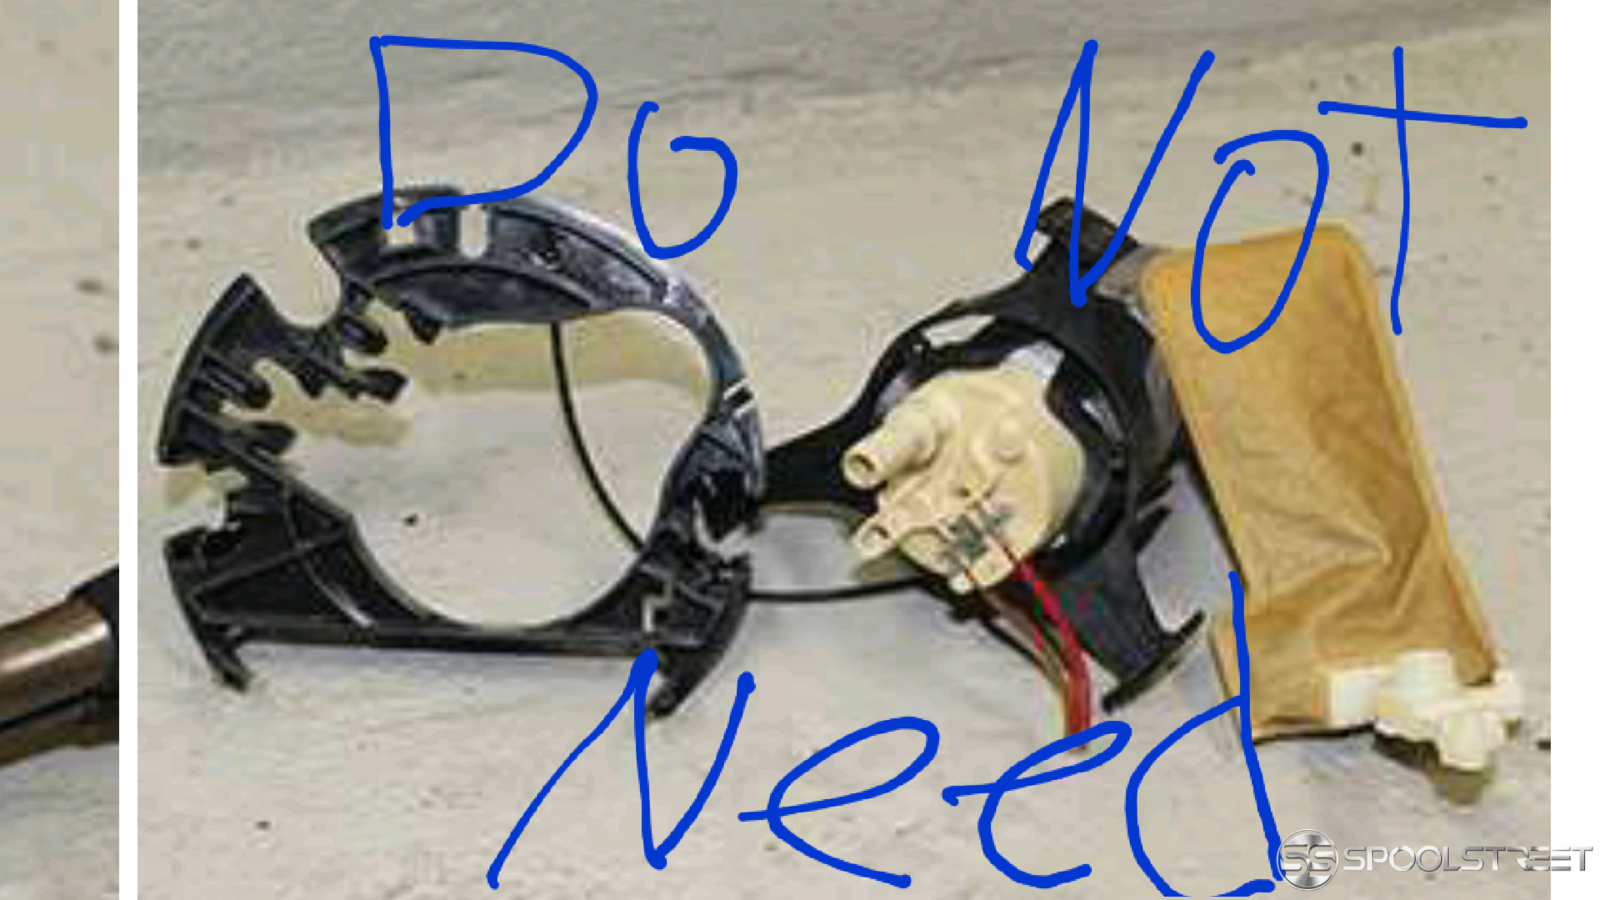
- In step 4 - You'd want to be most careful in this step when prying the plastic from the bucket. I tried heating and prying for 30 minutes on 1 side, only to have half of it break off (although the instructions and videos say glue/adhesive, you WILL be basically snapping the plastic and not prying adhesive!) what I needed. Then again, the other 2 sides pried off in literally a turn of the screw driver. In all honesty, I would have went at it harder had I have known what I needed and what I am throwing away. You only need the bucket, none of the black harnesses matter! That being said, you should still take precautions not to snap the bucket, so I found that supporting the back side of the bucket while twisting and prying was the most safe. The point that you are prying at, hold directly behind it so the plastic doesn't flex and weaken.
 - In step 5 - CAUTION: When using power tools around fuel, use your better judgement! Make sure to dry out all fuel from the system!
Just like step 4, if I had known what I needed to save and what I needed to toss out I could have saved some time and mistakes. So after prying the step 4 tabs with a screwdriver and pick, seeing how annoying it was, and then noticing how the tabs on step 5 are quadrupled the surface area AND width of the previous tabs I said screw this and brought out the power tools. After going through the instructions entirely, I saw that I didn't need the OEM black harness that holds the pump. Took my saw and cut the 3 points of connection to the tabs. Don't get lazy like I did and think you can get away with leaving some of the plastic tabs on there. All 3 tabs need to have as little black plastic on it as possible. Otherwise the bucket will NOT seat correctly inside the fuel tank. So after cutting the plastic connecting the pump harness to the tabs on the bucket, I took my most thin drill bit (1/32), drilled as close as I could in between the plastic tab and the bucket, did that once on the left, middle, and right side of the tab, and then pulled with the drill bit to snap the plastic off. Take a nail file or sandpaper and smooth it out flush to the bucket.
- In step 8, 9, and 11 - When working with light/shadows, be sure to take notice of where you position your light in reference to the position of the bucket. The more your source of light deviates from where it originally was or if your bucket moves as well, WILL cause the alignment to be off. Try and start in the most stable position you can find.
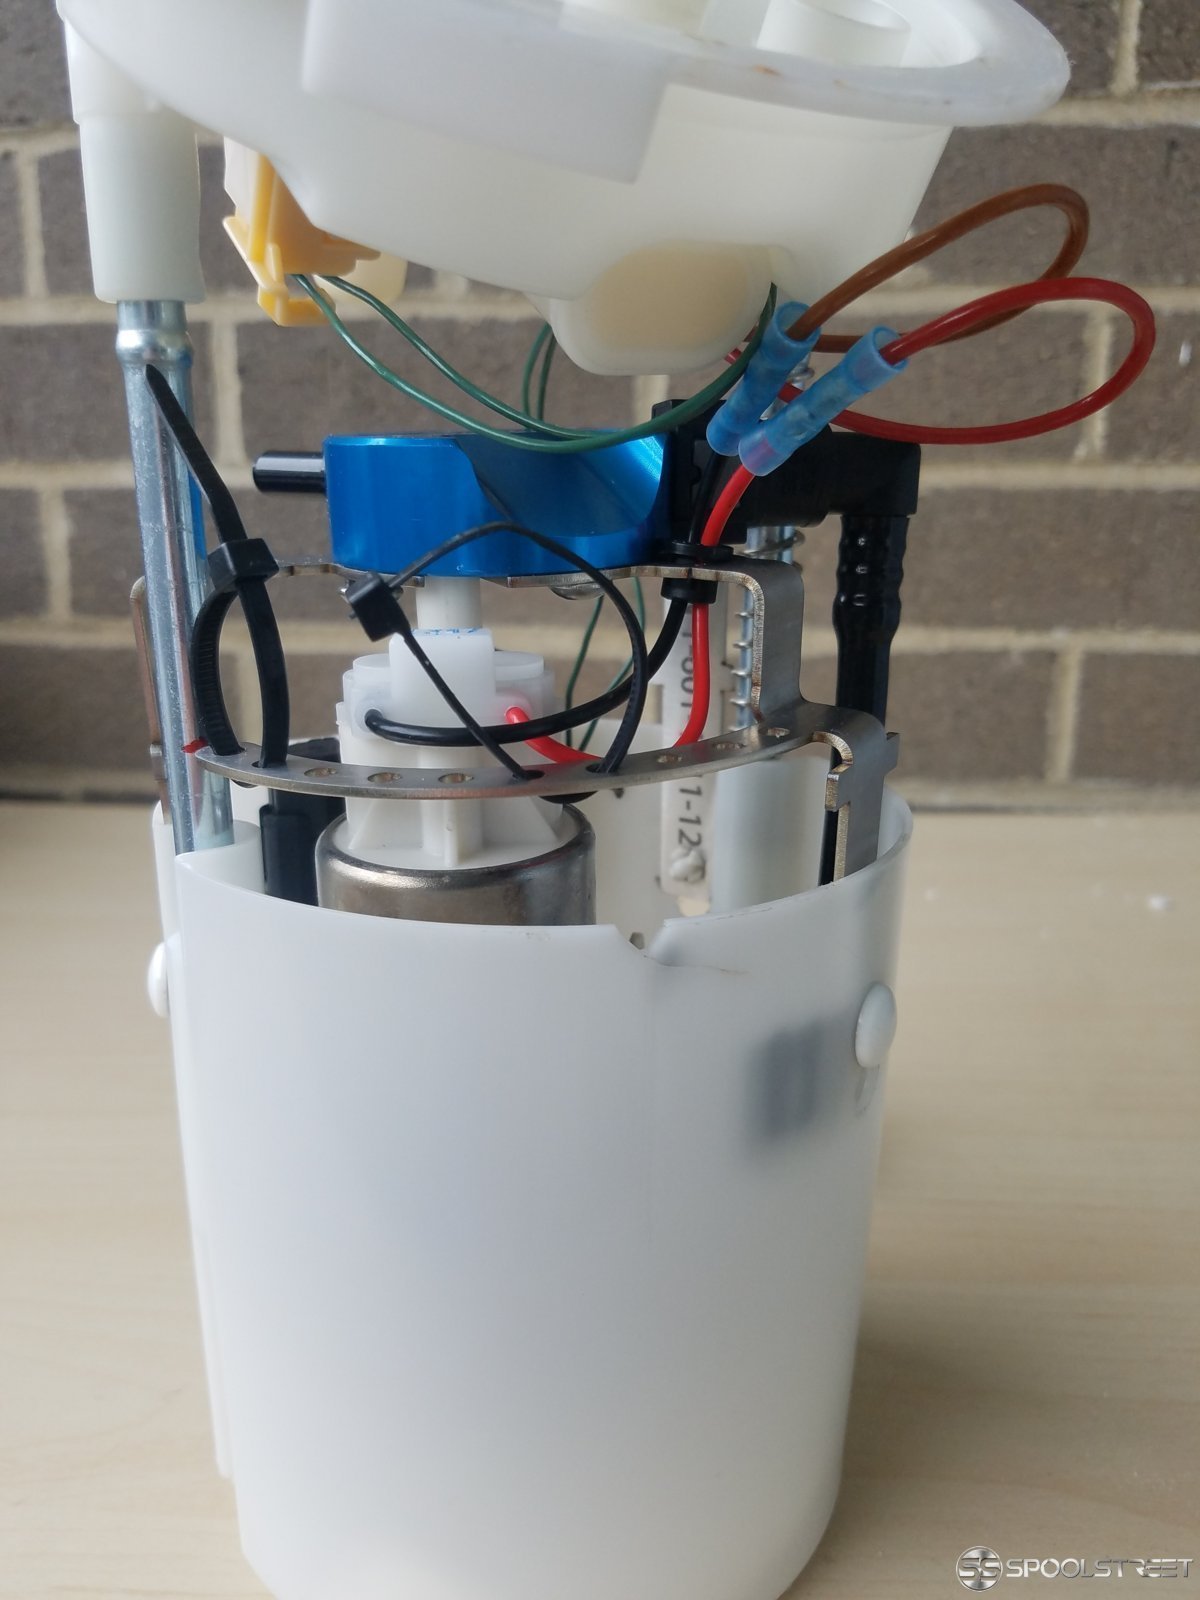
Finished Product!
See the small crack? As long as the bucket is structurally still sound, it doesn't matter.
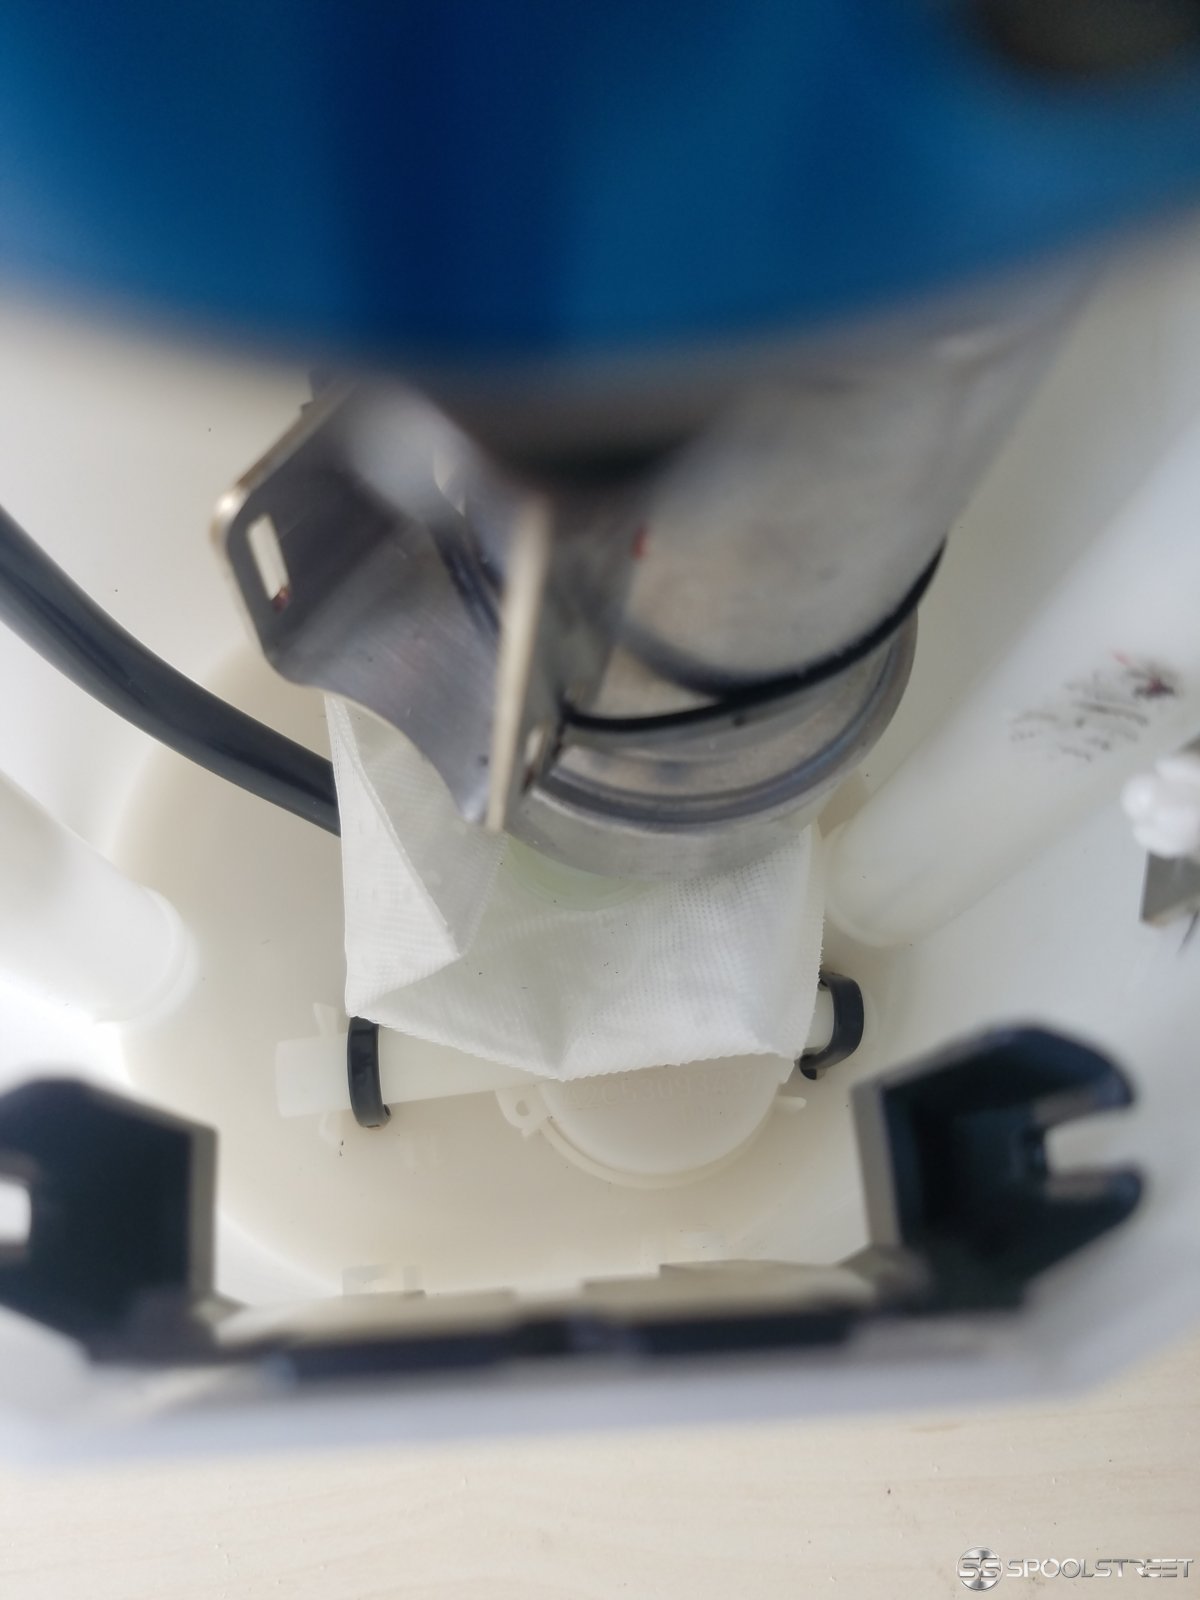
New Fuel filter/matt/sock and the stock Venturi locked in with zipties
In my opinion, this install is similar to a bigger FMIC install in the fact that you will have to cut and modify the original part to fit in the aftermarket part. Same with the FMIC install, a lot of people mention that in the beginning, they were worried and spent too much extra time making everything perfect, when in hindsight they would have went HAM on a bitch. YES, you should be careful but to an extent. The only thing that matters in this install is the plastic bucket (well and the venturi lol). That's it. Just do your homework before attempting and you'll be golden! Will post logs later, too few long straight roads around here and waaay too many cops in my area
), to answering any of my dumb questions almost instantly with no wait. Not to mention that PR's products are top quality! Definitely looking forward to future products from PR.(There is also the option for $50 to have PR assemble the pump I believe)
There are great DIY's from PR themselves, Fuel-It, and some others so I won't make one of those. I'll just post the links:
DIY From PR
(http://www.precisionraceworks.com/index.php?route=product/category&path=57
Tools Needed - Thanks @Abacus38 for the DIY (https://bmw.spoolstreet.com/threads/precision-racework-lpfp-install-stage-2.925/)
- 3/8 ratchet - Dremel tool - Wire stripper - Wire Crimper - Drill with various drill bit sizes. (The direction said you need a 7/64 bit but that's only for the initial hole you need to keep going up drill bit sizes otherwise you won't be able to install the push tab fittings on the bucket - Also extra zip ties and butt connectors just in case you screw up - Breaker/Cheater Pipe extra leverage for fuel lock ring
The removal of the stock LPFP was fairly simple with the difficulty being 5/10 from a person who is in between a novice and an amateur mechanic. The only difficulties were personal, such as my rusted lock ring. A couple tips though:
- When loosening the lock ring, I had to use a pipe over my ratchet because there was little to no leverage with my size ratchet
- Also when removing the lock ring, try and orient the 2 vent lines like in the pics above or in the Fuel-It video. When you turn the lock ring, it will catch on the lines and you could possibly damage them. These 2 vent lines are a HUGE PITA if you let them just hang in the middle and get in the way of everything so just position them to the side as best as you can.
- In step 4 - You'd want to be most careful in this step when prying the plastic from the bucket. I tried heating and prying for 30 minutes on 1 side, only to have half of it break off (although the instructions and videos say glue/adhesive, you WILL be basically snapping the plastic and not prying adhesive!) what I needed. Then again, the other 2 sides pried off in literally a turn of the screw driver. In all honesty, I would have went at it harder had I have known what I needed and what I am throwing away. You only need the bucket, none of the black harnesses matter! That being said, you should still take precautions not to snap the bucket, so I found that supporting the back side of the bucket while twisting and prying was the most safe. The point that you are prying at, hold directly behind it so the plastic doesn't flex and weaken.
Just like step 4, if I had known what I needed to save and what I needed to toss out I could have saved some time and mistakes. So after prying the step 4 tabs with a screwdriver and pick, seeing how annoying it was, and then noticing how the tabs on step 5 are quadrupled the surface area AND width of the previous tabs I said screw this and brought out the power tools. After going through the instructions entirely, I saw that I didn't need the OEM black harness that holds the pump. Took my saw and cut the 3 points of connection to the tabs. Don't get lazy like I did and think you can get away with leaving some of the plastic tabs on there. All 3 tabs need to have as little black plastic on it as possible. Otherwise the bucket will NOT seat correctly inside the fuel tank. So after cutting the plastic connecting the pump harness to the tabs on the bucket, I took my most thin drill bit (1/32), drilled as close as I could in between the plastic tab and the bucket, did that once on the left, middle, and right side of the tab, and then pulled with the drill bit to snap the plastic off. Take a nail file or sandpaper and smooth it out flush to the bucket.
- In step 8, 9, and 11 - When working with light/shadows, be sure to take notice of where you position your light in reference to the position of the bucket. The more your source of light deviates from where it originally was or if your bucket moves as well, WILL cause the alignment to be off. Try and start in the most stable position you can find.
Finished Product!
See the small crack? As long as the bucket is structurally still sound, it doesn't matter.

New Fuel filter/matt/sock and the stock Venturi locked in with zipties
In my opinion, this install is similar to a bigger FMIC install in the fact that you will have to cut and modify the original part to fit in the aftermarket part. Same with the FMIC install, a lot of people mention that in the beginning, they were worried and spent too much extra time making everything perfect, when in hindsight they would have went HAM on a bitch. YES, you should be careful but to an extent. The only thing that matters in this install is the plastic bucket (well and the venturi lol). That's it. Just do your homework before attempting and you'll be golden! Will post logs later, too few long straight roads around here and waaay too many cops in my area
Last edited: