2009 E89 Z4 35i Black to white build

Osiris

Specialist
Sep 19, 2019
83
13
0
South Africa
Ride
2009 E89 BMW z4 35i DCT
So I am porting over my thread from my original build thread on another thread as making all these posts again from scratch would take a life time. This was way back in 2017 and will be up till now. Just to be clear. This car was in a pretty bad state when I bought it. It was one of those buy with your heart cars not with your head šŸ˜¹

This is going to take me a few hours to complete!

So I bought the Z4 from KrS24 a member on our BMWFanatics South African forum.

The car is in need of some TLC with cosmetic stuff so far.
Firstly it has a bunch of scratches and swirl marks which I will sort out hopefully with a proper professional polish and detail.

The plastic adjusters on three of the cabin air vents were broken, so I will be visiting BMW to order those parts and then figuring out how to pull the air vents out to fit them will be the next step unless it can be done with a set of forceps tweezers which could work.

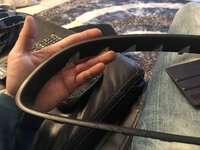
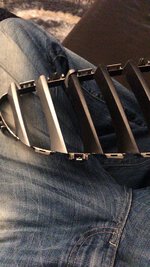
The right tweeter mesh was dented and warped so I tackled that today and managed to get it pretty close to the left one as possible, I don't think its noticeable at all now, it was an eye sore for me when I noticed it.

a few little clips here and there will need to be ordered from BMW. Then there is some funny rattle coming from the back of me when I drive, not sure what it is, some plastic sound.


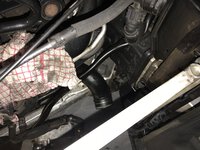
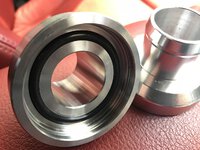
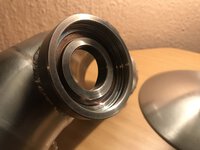
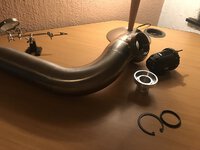
Next up is the exhaust note, it has down pipes which are nice but the catalytic converters in the middle of the exhaust were removed so it sounds very raspy, allot of peeps love that sound, I personally don't dig it too much so I will go get some boxes put there to sort that out.

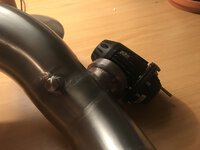
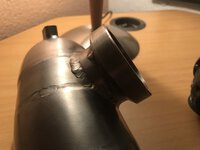
There is also a rattle sometimes that comes from the turbo waste gate which I youtubed and it seems to be a common problem on these cars, I need to basically adjust the actuator arm to stop this rattle, I will tackle this at some point or send it into a turbo place to have them have a look at this.

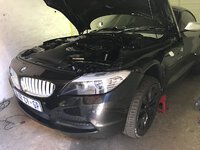
Anyways here are some pics I took of the car so far. :)
img_2252_1567673725.jpg


Just frikken love this red interior its absolutely beautiful.
img_2271_8671844387.jpg


img_2272_5137571869.jpg


img_2276_2739950180.jpg


I forgot to take a pic of the before but here is the mesh once I was done, it took allot of rolling out to get it to this state, its very delicate and dents easily if pressed too hard.
img_2297_7488086037.jpg


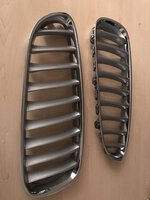
Yesterday I managed to find this :rollsmile:
Just need to order the inside mesh and get it sprayed and fitted now. This will transform the car as I really don't dig the current non Msport front bumper.
img_2305_2868156144.jpg


Other than these things the car is lovely and allot of fun to drive. I will update with the things I do to the car and fix, so far I have been cleaning all the rubber seals and nooks and cracks everywhere in the car to try get it back to its former glory.
 
  • Like
Reactions: doublespaces

Osiris

Specialist
Sep 19, 2019
83
13
0
South Africa
Ride
2009 E89 BMW z4 35i DCT
Ok so update time.

I took the car to Powerflow Randburg today to sort out the exhaust sound as I mentioned before the cats were removed and the car had a very raspy sound that I personally don't like at all. However this particular sound was ugly as all hell and here is why.

I will let the pictures speak for themselves. I can quite honestly say that this is some of the worst exhaust and welding workmanship I have ever actually seen to date.

img_2339_1478917584.jpg


img_2336_7469558892.jpg


I mean there are actual holes even :skit:
img_2352_622592652.jpg


img_2335_1168195614.jpg


img_2361_5738818417.jpg


Anyways Powerflow cut that mess off and built a new mid section. Stainless steel pipes with mid boxes:

img_2357_7345168874.jpg


img_2358_3802748704.jpg


img_2359_5361258215.jpg


img_2360_357592748.jpg


You can see here how flush it is with the bottom of the car. No canisters hanging out the bottom.
img_2362_8881552424.jpg


First impressions so far. It doesn't feel like the same car even. It sounds beautiful, idles softly like it should and when you open the throttle it sounds beautiful, when driving around normally at 60kph in the cabin you just hear the light sounds of the turbos spooling up and down and the small dumps from the BOV. no longer hear horrible Raspy tinny wierd exhaust sounds. While on the highway at 120kph she is quite, put your foot down and the throttle response is much better and she sounds amazing.

Very happy with the sound and drive of the car now that the exhaust is done. I would love a full stock exhaust and keep the downpipes but that's never going to happen lol so this is as good as its going to get.

I found the source of my xenon problem facing down at the road, I am not even going to post pics of it as it upsets me too much, I am just going to try get a new arm for the sensor and fix this problem ASAP. BMW's quote is a bit retarded so I am going to try a few other places tomorrow and see what I can do.
 

Osiris

Specialist
Sep 19, 2019
83
13
0
South Africa
Ride
2009 E89 BMW z4 35i DCT
Unfortunately I never went under the car to look when I had a look at the car so I didn't know about this exhaust situation. We live and learn!

The little missing clips and stuff like the bonnet catch etc he did tell me about, other little things I found like missing clips here and there because I am pedantic about everything.

He did ask for the photos of the exhaust to put on hello peter and send to the manager of the exhaust place that did this shocking exhaust work. I am not going to name and shame as its not my place to do that as I never paid for this work, but if KrS24 feels that he should name and shame the place who did this exhaust he is welcome to do so. Hopefully he does so that other forum members don't get this done to there cars.
 

Osiris

Specialist
Sep 19, 2019
83
13
0
South Africa
Ride
2009 E89 BMW z4 35i DCT
Here is a pic of the front of the car before the Msport front bumper goes on soon.

This is actually a kak deceiving photo lol, it makes this ugly front bumper look better than what it does. I got lucky with a flattering angle :roflol:

img_2317_1899712844.jpg


This is more along the lines of what it looks like:
I am still trying to figure out what BMW was thinking when they decided to put this bumper on the 35i version of the Z4...It really does the car no justice at all. The Z4 should have only come out with the Msport bumper, This bumper ruins the lines of the car.

img_2273_5198132111.jpg
 

Osiris

Specialist
Sep 19, 2019
83
13
0
South Africa
Ride
2009 E89 BMW z4 35i DCT
Gave the car a very good wash yesterday and took a pic or two.
Starting to come together, got my parts from BMW, the little missing clips here and there.

Will post pics up of the stuff missing before and after later on.

img_2546_2897093147.jpg


img_2542_736625664.jpg
 

Osiris

Specialist
Sep 19, 2019
83
13
0
South Africa
Ride
2009 E89 BMW z4 35i DCT
Update time.

I decided to take my dash apart last night as these missing vent tabs were just starting to annoy me way too much.

img_2678_6855282196.jpg


I forgot to take a pic of me removing these screws from the glove box but I highlighted the screws that need to be removed.
img_2684_8083741366.jpg


img_2679_7046323237.jpg


I then gently pulled the dash trim off trying hard not to break any clips which I managed to do successfully
img_2685_6224845312.jpg


I then removed the two screws holding the vents in and pulled the vents out.
img_2686_2517450973.jpg


Wires Disconnected.
img_2692_8444750406.jpg


bastard screw that fell deep into the dash.
img_2690_4570641038.jpg


Loose screw causing horrible rattle sound.
img_2691_8134126430.jpg


Vents out and ready for stripping.
img_2693_6514802784.jpg


Removing vent surround.
img_2695_1966644078.jpg


img_2694_2429859037.jpg


img_2696_5640018316.jpg


img_2700_4927118392.jpg


Vents getting a bath!
img_2713_2094217776.jpg


Vent tab fit and repair process started!
img_2704_5193703589.jpg


img_2708_8526874254.jpg


img_2706_3328756843.jpg


img_2712_179270724.jpg


Broke this bit off like a knob goblin by mistake which would have rendered this whole process a fail as the vent slat would hang out and look retarded and the tab would be useless. But I managed to q-bond it back and then plastic weld it.
img_2714_1575334379.jpg


Vent Tabs all put in and fixed so that they never break off again!
img_2716_7639561709.jpg


Time to sort out annoying rattles, while this trim is all off!
img_2717_9790278468.jpg


img_2719_1605518045.jpg


:rollsmile:
img_2721_4869313491.jpg


Surround re-fitted.
img_2718_4830459058.jpg


Fixing of the Engine start that looks to be previously plastidipped (I HATE THIS PLASTIDIP stuff)
img_2722_2990657724.jpg


img_2723_4122694586.jpg


Everything finished and fitted finally at 4am.
What a difference! Starting to look like a BMW again!
And no more rattles from the front of the dash! :rollsmile:
img_2724_591003685.jpg


img_2728_3338971179.jpg


img_2729[1]_8892119741.jpg


Next up is remove the back silver trim headrest things behind the seats and foam pad proof those as they also make plastic creaks and rattles. Gotta find a link that shows how that is done.
 

Osiris

Specialist
Sep 19, 2019
83
13
0
South Africa
Ride
2009 E89 BMW z4 35i DCT
Update time.

Car was sent in yesterday to get all this crap sorted.
Turbos have been removed and here you can see the problem.

Pic of the turbos.
img_2752_4222611975.jpg


This should not happen at all, there should be NO play at all on these things.
[video=youtube]


Here is a pic of the down pipes and sub assembly of the car all stripped.
img_2755_1712610325.jpg


Side of the engine, Notice the sump gasket leak and heavy sweating, will have this replaced while its all off.
img_2756_14599584.jpg

img_2754_5554045145.jpg


More leaky sump gasket.
img_2758_4919237545.jpg


So hopefully this gets sorted, I will go visit the mechanic again when he gets the turbos back from the engineers with the new bush kit fitted and take another video.


Osiris

Specialist
Sep 19, 2019
83
13
0
South Africa
Ride
2009 E89 BMW z4 35i DCT
So bit of an update:

Fixing the turbo waste gate actually costs more than buying two brand new turbos. Tunetech refuse to fix the bush if you give them just the turbos, They want the whole car so they can charge you through the roof. 16k before they even get started lol

My mechanic sent my turbos off to get the wastegate fixed and found that the center cores were worn, So replacing the center cores as well as fixing the wastegate rattle costs more than buying two brand new turbos if your trading your old ones in. I am not sure if I got taken for a ride or not here as I am not a turbo engineer but the one turbo did have a bit of play on it however they were not smoking. They were however very loud on spool up and spool down and I remember my 330d was sounding like that just before the turbo exploded into 4 pieces so I am not sure. The seller did say that the turbos were always loud with him too, I remember him mentioning in a old post that the turbos made a whining sound. We will see how the new ones sound to see if its because of the downpipes that they are so loud.

At the end of the day the car will have 2 brand new turbos from BMW which gives me piece of mind...I guess.

So I sent my old turbos in to BMW and ordered two new turbos which I will get on Monday morning.
Turns out if you give them your old turbos you get a massive discount. Apparently the wastegate rattle problem has been fixed in the later revisions of these turbos.

What my old turbos were reduced to.
img_2837_7742298156.jpg

img_2838_1807032683.jpg

img_2839_8752946532.jpg


Things that are getting done as per quote:
Engine Flush
Fuel Line Cleaner
Engine Wash - Full
Degreaser
6.5 Synthetic Engine Oil
Sump Plug Sealing Washer
Sundries
Oil Filter
Cabin Filter
Tappet Cover Gasket
Turbo Charger Cylinder 1 - 3 Supplied
Turbo Charger Cylinder 4 - 6 Supplied
Wheel Alignment
Engine Sump Gasket
Turbo Oil Drain Pipe Gaskets
Turbo Oil Drain Pipe Seals
Carry Out Oil Service
Remove & Refit Cabin Filter
Remove & Refit Tappet Cover
Remove & Refit Turbo Chargers
Remove And Refit Engine Sump

He is also fitting the new O2 sensor that I got with the car.

Should get the car early next week hopefully.


P.S. Most of this was bullshit hence why you will see later on in my posts I stopped using mechanics and carry all work out on my car on my own and with a friend from time to time. My car hasn't seen a mechanic since 2017 after this crappy turbo install was done followed shorty by another turbo install by BMW being the last as you will soon ass in proceeding threads.
 

Osiris

Specialist
Sep 19, 2019
83
13
0
South Africa
Ride
2009 E89 BMW z4 35i DCT
I decided I am not going to hide anything I find on this Z4 cause I am fixing it all anyways.

This is the reason my xenon headlights were facing the ground. :smashScreen:

I actually have no words for seeing something like this on a Z4 35i This is a premium car that sold for almost a bar brand new. To see stuff like this actually kills my soul. Never mind the stuffed up exhaust...To see my headlight auto adjuster sensor held in place with a shoddy mangled piece of copper wire really makes me question things about this car.
xenon%20auto%20adjuster_8331658346.jpg


This was a shock to my system to say the least.
 

Osiris

Specialist
Sep 19, 2019
83
13
0
South Africa
Ride
2009 E89 BMW z4 35i DCT
Thanks guys, Who knows what else I'm going to find lol

I won't lie its making me a very moody and easily agitated person to be around at the moment. <--- somehow that sounds like bad english....don't really care right now.

I received the "New" turbos this morning from BMW and dropped them off with my Mechanic. Definitely look refurbished to me but at least they come with a 2 year warranty from BMW.

Here are some photos:

img_2857_8159233904.jpg


img_2858_1989967031.jpg


img_2859_9977763728.jpg


img_2860_405598911.jpg
 
  • Like
Reactions: doublespaces

Osiris

Specialist
Sep 19, 2019
83
13
0
South Africa
Ride
2009 E89 BMW z4 35i DCT
So I am just going to leave this here for the world to see:
img_3295_4033380197.jpg


So for those of you who are not familiar with turbos and Actuators, that is the turbo actuator arm that is used to pull the waste gate closed that is required to build boost. As you can see its solidly stuck in place! I have no words for this type of workmanship!!!

So the symptoms I was having was that the car was driving fine but as soon as I pressed the accelerator in a little to rev the car past 2k rpm which is really not allot to ask for, The engine light would come on and the car would go into a serious limp mode! So the reason this is happening is due to the fact that the effing actuator arm can't pull the waste gate closed to build boost. The car then freaks out and goes mad.


You can also see there is a bolt in place of my 02 sensor! That's cause I gave the guy a brand new one to use that Chris supplied me with the car as a back up. after replacing vacuum lines that the mechanic seemed to have damaged I then told him to take the new o2 sensor out thinking that it was that causing problems and told him to put the old one back. I am pretty sure he dropped my new one or something cause its causing issues too. Could all just be the fact that the turbo actuator is stuck in place though. Anyways he didn't have enough time to drop the suspension to put the old one back and he has dented the new one, he assures me all the tech in the o2 sensor is right on the tip and not where its been damaged! I want to kill this oak I wont lie!

The car will goto him on Thursday morning and he will need to correct this problem!
 

Osiris

Specialist
Sep 19, 2019
83
13
0
South Africa
Ride
2009 E89 BMW z4 35i DCT
ok Update time:

I have gotten my car back a few times and sent it back due to it being in an unacceptable condition.

the clamp was moved out the way of the actuator and no more engine lights were being thrown and everything seemed to be good on Friday last week, I started the car in the workshop and it sounded good, I revved it to see if the turbo rattle was still there and to my HUGE surprise it was gone! My suspicion to this is that while trying to narrow down the problem of rough idle and engine light coming on that it could be a bad vacuum line so I was fiddling around in the engine bay with the vacuum lines and when I touched one of them the car suddenly started idling properly so I asked him to replace those lines all the way to the brake booster vacuum line that they both plug into. Since then the turbos no longer rattled, obviously wasn't pulling the wastegate closed properly.

Anyways I had him move the clamp off my turbo actuator arm as shown in previous posts, and went to fetch my car on Friday afternoon, all seemed great, I drove the car back to work and it was driving ok, the power I was used to was not there and it sounded like a windstorm, I thought it must just be a loud spool on the new turbos being amplified by the down pipes. But was told it might be a boost leak, it seemed to get a bit worse, I then went to visit my dad and revved the car for him and BAM the fucken rattle was back but BAD! worse than even the old turbos.

Took the car home and got my trusty torch out and started searching and to my disgust I found the clamp they had moved was completely loose and dangling on the turbo outlet pipes ("This was the cause of all the ugly rattling sounds which I thought was turbo wastegate rattle"). I found another clamp that was also completely loose, and when I say loose I mean the clamp was almost falling off, a few more minutes of driving and the nut would have vibrated off.
I spent the entire friday night busy tightening these clamps and sending photos back to my mechanic of all my findings of his shit workmanship from hell.

Thought ok cool, boost leak must be gone, take the car for a drive and its even worse! :skit:

Spend Saturday evening searching under the bonnet till early hours of the morning for more loose clamps or something that must be loose or cracked etc but found nothing. I gave up and thought let me take it to the car wash on Jan smuts that has a lift and see if I can check if maybe the intercooler inlet and outlet pipes are loose and this is what I found:

As you can see the entire clamp is missing FFS :RedNo::skit::smashScreen:
img_3458_1376331411.jpg


Am I even surprised...NO

This clamp that is tight in the pic is the other clamp I found that was completely loose:
This is the other downpipe
img_3421_8310725991.jpg


Mechanic tells me that his guy that fitted this for me assures him that the clamp was on the car, so my theory is that he didn't bother to tighten it and it fell off the damn downpipe because he had to order a new one for me yesterday!

anyways I collect my car today and everything seems hunky dory, so I look in the engine bay and check the clamps that I can get to with my hand and they are all tight, I ask my mechanic if he has driven the car to see if the boost leak is gone and he said no so I said right lets go around the block, and low and behold the boost leak is still there. even louder, so now that the clamps are all on and tight the air is pushing even harder out of where ever the hell its escaping from, so I goto work without my car again and come back later and he tells me he found a hair line crack in the inlet pipe by the firewall and fixed it via plastic welding, cool so we test drive the car and boost leak is still there sounding like a tornado.
We take the car back into the work shop and i pull my sleeves up and we both start searching this car for this leak, unfortunately he didn't have a boost leak tester. We failed to find it other than to find that its coming from the inlet side of the car, so I took the car home and said I will look around and see what I can find and the car is booked into BMW tomorrow so they can also have a look.

So this is what I found an hour or so ago:
I took the charge pipe off and was going to put a boost leak tester on that I had built for my old volvo to see if maybe this clown put a hole in my intercooler.
img_3543_6395849455.jpg


The o-ring is completely mangled.
img_3546_5089556807.jpg


img_3547_4956219126.jpg


img_3548_3228974584.jpg


I tried to save the thing and do a temporary fix but to no avail, the o-ring just wont seat correctly in the groove on the charge pipe so I will goto my mechanic and get an o-ring from him which I am sure he will have and then fit it myself lol.

While I was at it I asked my mechanic while I was at his shop if he has any more of that vacuum line that he gave me last time and he did so I took 4m of the stuff and decided to replace all the vacuum lines in my car as they feel pretty hard and old and probably prone to cracking like the others did:

old vacuum lines:
img_3544_923233372.jpg


The new, This stuff feels very solid and doesn't collapse on itself under pressure which is why I wanted to use it:
img_3545_7054879926.jpg


I also had the car last weekend when I was tightening all those loose clamps and I decided to give my engine bay some much needed love:

So this is the before, notice how scratched and tatty it looked:
before_8268437408.jpg


and here is after some TLC:
img_3334_452326294.jpg


img_3336_839850381.jpg


Then the engine after some cleaning and scrubbing with clean green, still going to do this properly once everything is sorted, get the missing clips all over the place for wires and pipes and move my water bottle to the correct side. It is starting to take shape and is starting to look good.
img_3335_408758311.jpg


P.S. This white wheel lettering was me being stupid, I definitely don't do crap like this anymore :joycat:

I attempted to paint my rims with a white paint pen, but it lasted one day and started cracking so I have since bought another paint pen with what seems to be a much more flexible paint but here is how it looked anyways:
img_3332_9233906213.jpg


Oh and my car had this horrible what felt to be a rough idle once the car went down to around 500rpm and it worried the shit out of me but this is the cause:

He put the exhaust back wrong so the tail pipe was touching the body of the car, fun times. Gotta love this workshop long time:

img_3483_7189866676.jpg


On another note, I got my D-can cable from Chris on Sunday and he helped me take the MHD rattle fix off the car to see if the turbo rattle really was gone and wasn't just being hidden by the software and it seems to definitely be gone :=): He also showed me how to use the MHD software to read errors on the car which is pretty cool, car seems to be ok other than the boost leak.

Anyways that's all for now, I will update tomorrow if I manage to get that o-ring and hopefully that sorts this problem out, would love to know why the hell the mechanic removed my wastegate in the first place??
 

Osiris

Specialist
Sep 19, 2019
83
13
0
South Africa
Ride
2009 E89 BMW z4 35i DCT
Ok Update time again.

I finally got my new Bonnet latch cable from BMW and decided that tonight was the night to fit it:

The problem:
img_3694[1]_8402819409.jpg


img_3728_7124392422.jpg


Stripping begins:
img_3729_404078559.jpg


The new cable, the latch mechanism is in a bag on the other seat.
img_3731_3813903406.jpg


Pulled it through the firewall, Filthy down there too.
img_3734_2087413482.jpg


Latched in and connected:
img_3733_3114081099.jpg


After a good cleanup:
img_3738_182781470.jpg


New Latch mechanism in place and cable connected:
img_3739_8885189080.jpg


All back together and working 100% :rollsmile:
img_3756_8731068321.jpg


Here is the offending cables condition up close:
img_3752_4144087014.jpg


Finally I can open my bonnet without slicing my fingers or using pliers.


This past weekend I went on a bit of a cleaning spree as well and a rubber restoration spree too:

Oil filter housing before:
img_2304[1]_3900416973.jpg


I used d-greaser as well as clean green here and then I used my dremel to polish the alloy and remove suborn dirt, I am only half way done with this as I need a new polishing tip as this metal bristle polishing tip is kaput after this, but it was well used before this anyways:
img_3749_5156888039.jpg


This is what the rubbers and plastics looked like before hand:
untitled-1_1198548246.jpg


This is after many hours of using a rubber treatment and a paint brush and then buffing with a microfiber towel left it looking like:
img_3751_7523151203.jpg


Pic of a nice clean looking interior, still proud of my nice fixed vent tabs.
img_3757_3463958003.jpg


Next up is a new washer fluid reservoir as this one got melted from the top mount turbo that was in the car at one stage and then the coolant expansion tank relocation and o2 sensor install.
 

Osiris

Specialist
Sep 19, 2019
83
13
0
South Africa
Ride
2009 E89 BMW z4 35i DCT
Another update.

So I found that my inlet pipe to the rear turbo was not on the turbo properly, I pulled it out and this is what I found, My mechanic told me it had a small crack so he plastic welded it but it most definitely didn't help.

Firstly here is what I ended up doing cause the amount of shit your arm gets caught on is amazing and painful lol:


img_3920_9830697453.jpg


This is what the pipe looked like:

img_3923_8889520131.jpg


img_3925_1198779568.jpg


Anyways I managed to get a new pipe yesterday from somone that had a set as they put other inlets on their car. I ordered a new rubber grommet too.

No pics of that unfortunately.

Anyways so this happened today, was like xmas :D:

img_3932_5237024822.jpg


so here is why I ordered a new washer fluid bottle:
img_3938_5655607301.jpg


img_3939_9702057125.jpg


img_3947[1]_5685965218.jpg


So this happened due to the top mount turbo that had been put on the car previously. It was heat shielded but it didn't help.

So anyways out with the old and in with the new :D

Engine bay looking like new finally!!
img_3943_4927388085.jpg


AAAAAAnd my expansion tank has been relocated thanks to Afzil who also changed my O2 sensor and now my cars Air fuel ratios are perfect FINALLY!
img_3944_7691208971.jpg


I decided to do a bit of Autosol polishing of pipes that are now visible due to expansion tank relocation.

Here is a before and after, it actually looks allot better in the metal:
autosol_2088566590.jpg


Next up was the angel Eye halos. Although the yellow/brown didn't look too bad on this car it was time for a proper upgrade:

Here is what it looked like before we begin:
img_3824_1412804690.jpg


So after trying many different LED setups and always having the same kak result of the inner ring being lit up and the outer ring hardly getting any light I decided to go another route altogether, something everyone told me was impossible due to the fact that the halo's dim when the lights low beam xenons switch on.

So I decided to try Carly Coder out and stopped my halos from dimming when the main low beam xenons come on so that I could do my mod.

It worked, now the voltage doesn't drop so a xenon can't throw and error or start flickering!

So let us begin:

Here is the purchase that I made:
img_3953_1445776615.jpg


I needed this to be a stealth install, I don't like seeing messy wires that don't belong under a bonnet, especially not under this bonnet with the amount of blood sweat and tears I have had in trying to get it perfect which has been a hell of allot of work thus far.

So I decided to get the wires in from under the headlight, which would have been easy had it not been for this little surprise lurking in the dark!

This little shit of a screw is underneath the damn headlight so pulling the headlights out is next to impossible, I could probably get a ratchet in there but the space is so small to get your hand in there from behind the headlight that getting that screw back on will be impossible unless I had a camera and a screen with forceps :biglol: so year F#@k that shit!
img_3954_1064739120.jpg


So the dremel came out to play and I made a small hole in the bottom of the headlight by going through the top, its hard to explain lol here is a pic:
img_3960[1]_4856481621.jpg


This allowed me to bring stuff in:
img_3963_3541479022.jpg


Then I could put the bulbs wires back through the hole and underneath the headlight but it was a pita of a job to do this as the spaces are so small.
img_3962_3973325411.jpg


Installation done, no wires anywhere to be seen:
img_3969[1]_7200493062.jpg


Now I was worried that heat may be an issue, so I plugged my car on charge and ran this setup for over an hour with halogen halo bulb on the one side and xenon on the other side and felt temps around the area and watched carefully to see if any melting was happening or burning and it turns out that the halogen side was a bit hotter than the xenon side by touch, I would like to get a laser heat temp gun to make sure im not going mad, but as far as I have read, a xenon bulb is very hot at its core, but radiates less heat as you move further away from it where as a halogen is like a little heater.

anyways here is the result of a xenon powered angel eye:

That is Sugan standing on the left, the owner of Violet electronics who helped me get an 8000k H8 xenon bulb for me today:

They are so bright I am able to drive without my headlights on and just using my angel eyes :rollsmile:
img_3951_6530629112.jpg


The camera struggles to take pics of it and kinda makes the one look a little green.
img_3977_5909251607.jpg


img_3974[1]_1777958832.jpg


img_3975_3888301481.jpg


You have to see them in person to appreciate the true beauty of them, its nothing like the LED kits that you put in here, its on a whole new level, best visual mod I have done so far.
I might build little fans into the bottom of the headlights just as a preventative measure to make sure they don't run too hot on a really hot day, this will be done when I pull the front bumper off to put the Mspot bumper on.

I am going to drive around like this and monitor them and check for any signs of over heating but so far so good, and it looks super cool when you unlock the car with the remote as I also used Carly Coder to make my headlights switch on as well and not just the angel eyes.

I also made my mirrors fold up with the remote now when locking the car :D and made it so that I can open and close the roof while driving but as long as I am doing no more than 30kph, this has changed my life lol.

Anyways she is almost there.
 

Osiris

Specialist
Sep 19, 2019
83
13
0
South Africa
Ride
2009 E89 BMW z4 35i DCT
Small update:

I got my car back from BMW, New set of turbos fitted again but this time all work was carried out by BMW instead of a doos mechanic named Ricky who works at a workshop named Autoworx.

So in order for my claim to go through bmw wanted me to convert the car back to stock, so thanks for Firi for organizing me his intercooler within an hour or two of me asking him and getting it ready for me to collect at a moments notice.
Also thanks to Chris for organizing me a set of intake pipes as the previous mechanic also stuffed those pipes up. This was also organized for me at a moments notice and was ready for me to collect after work. Thanks guys, these parts made it possible for me to get the car to a state where bmw accepted it for the warranty claim to go through.
BMW told me my mods are not responsible for the turbos popping in less than two weeks but needed it to be stock to put the claim through. Also the car had so many boost leaks that they couldn't tell if the noise was due to a boost leak or a faulty turbo so that was the other reason for having to convert it back to stock.

These are the parts that were all removed from the car:
unnamed_3464871654.jpg


The car now drives better than the day I got it, it idles so smooth and quietly, The throttle response is so much better.
There are no more funny sounds coming from the car, no funky noisy turbo rattles and other strange gushing wind sounds.
Even the exhaust note is better and the car just all round drives so much better and the way it delivers power is a hell of allot smoother and better, it used to be flat and then smash you into your seat and I am almost certain that it was due to boost leaks.

I am going to have to see if I can sort out the kink in the intercooler outlet and inlet pipe as the car was boost leaking from those two spots, then I want to get the HKS BOV and have a steel engineering place create a new foot for the BOV so that I can weld it to the current stainless steel charge pipe before I go the new charge pipe route which seems to be quite costly.

For now I am going to drive the car for a little while in stock form and then get it carbon cleaned and the new radiator fitted as soon as possible.
 

Osiris

Specialist
Sep 19, 2019
83
13
0
South Africa
Ride
2009 E89 BMW z4 35i DCT
small updates. Some cosmetic stuff. Beware.. Ricer stuff HAHA Damn what was I thinking back then LOL and by the way I HATE black rims. this gets better guys don't worry ;)

Second round of painting the tires with a better quality paint to see if it lasts this time.
img_4414_4255609759.jpg


img_4409_1423106025.jpg


img_4410_1548804878.jpg


img_4416_5644650598.jpg


img_4418_7495376551.jpg


So I have been running the xenon bulbs in my halo's for a while now and no burning has taken place, everything seems to be working fine.

img_4419_4540838459.jpg


I would like to get my headlights polished at some point to try and get them as perfect as possible, Will then VPS them or something to protect them from any future stone chips.
img_4395_6080568833.jpg


I also then did some polishing of the hubs while I had the rims off to paint the lettering and cleaned up a bit behind the wheel.
Before:
img_4402_4010719279.jpg


After:
img_4406_5797503064.jpg
 

Osiris

Specialist
Sep 19, 2019
83
13
0
South Africa
Ride
2009 E89 BMW z4 35i DCT
Hey guys so a small visual update, changed the tips and painted the calipers this weekend.

So this is the reason for me wanting to change the tips, was really bugging me.
img_4449_472698737.jpg


so here are the new tips, received from CF Accessories, was really nice dealing with these guys.
I am not 100% sure of these tips as to weather they suit my car or not, However they are growing on me.

img_4575_245399805.jpg


img_4574_4319392908.jpg


img_4572_4397098049.jpg


img_4574_23764404.jpg


Then yesterday I decided to fit my new rear pads as my car won't stop complaining about them even though there is still a shit load of meat left of them. I do not like how these newer BMW's want you to change pads long before they are properly worn.
I decided to spray the calipers red while I was at it, this took me hours as I prepared the surfaces properly to be sprayed, also took the rear calipers apart so as to not spray the pads themselves or the retainer clips etc as I prefer it when the colours are broken up a bit.

img_4545_4538506255.jpg


img_4544_7184989284.jpg


img_4552_3850741568.jpg


img_4554_8933013360.jpg


img_4556_8862897045.jpg


img_4557_8152104318.jpg


img_4567_7283687228.jpg


img_4568_9044806985.jpg


img_4578_5337369395.jpg
 

Osiris

Specialist
Sep 19, 2019
83
13
0
South Africa
Ride
2009 E89 BMW z4 35i DCT
Oki Doki,

So Quite a big update....I have been busy with this thing lately.

So first up I started removing old ugly plastidip from grills and mirrors cause it was bubbling and peeling and just really made the car look tatty.
I want these things to be black, but I will rather have them sprayed in gloss black to suite the rest of the car. I don't like the sheen that plastidip gives.

Here you can see the state it was in.
why%20i%20hate%20plastidip_7372252023.jpg


img_4866_2632832797.jpg


mirror%20plastidip%20removal_1354243624.jpg


Kitty cat chilling on me while I'm trying to peel plastidip!
ing%20while%20im%20removing%20plastidip_1622447781.jpg


all gone!
So it turned out that peeling the stuff off was a waste of time, if the plastidip is too thin in certain places its next to impossible to get it off so I tried a few things and the thing that eventually worked like a charm was engine cleaner, I painted it on with a brush and waited a minute and then used the same paint brush to just wipe it off gently it basically just melts the plastidip instantly.
plastidip%20all%20gone_7608432304.jpg


Next up I needed to sort this problem out on my charge pipe so that I could fit the HKS BOV to my car, so I sent the aluminum base to a metal shop called Glutek and they fabricated the same part for me out of stainless steel so that I could then send it to TMSS to get welded on nicely.

Alloy on right Stainless steel with O-Ring correctly seated on left!
img_4736_1151597071.jpg


img_4738_5997377559.jpg


Welden on by TMSS
img_4771_2602802230.jpg


img_4772_4683789163.jpg


Getting ready for fitment:

img_4774_5479543642.jpg


hks_bov_6601648931.jpg


and its on and fits perfectly!
img_4776_4683789163.jpg


img_4778_6268445714.jpg


Now all I need to do is prime the pipe and spray it matt black, I bought a rustoleum textured black spray paint which will look great.
Want this thing to look stealth under the bonnet. Big shiny pipe with the old pink BOV didn't do it for me lol.

Now since I bought the car it had a bit of a radiator leak, it wasn't massive although if the car got hot enough in hot weather driving or pushing it, it would leak a bit more. So I finally managed to take the radiator out and send it to a radiator place to get it pressure tested to show my warranty people that it is in fact leaking and that they must pay.

So the radiator place wanted to remove the radiator for me at first and when they told me they need to remove my front bumper to remove my radiator I lost all confidence in them and told them ill remove it myself and bring it to them. :skit:

Jacking the car up and getting it on my new jack stands! :smilebounce:
car%20jacked%20up_7242603711.jpg


Making sure nothing gets scratched or damaged while removing this thing!
protecting%20my%20engine_3084357562.jpg


Metal brace removed to expose the radiator to make it nice and easy to slide it out from the top.
exposing%20radiator_5242444579.jpg


let there be light!
img_5239_725613450.jpg


Intercooler out.
intercooler%20out_324650998.jpg


Radiator bleed screw exposed and you can see coolant leaking.
coolant%20leak_694954902.jpg


img_5240_4217969225.jpg


Electric fan removed as well.
cooling%20fan%20out_2432884545.jpg


And its out! after many hours of fighting with a bottom big hose that was being blocked by a metal bar in front of the engine that I didn't see in my frustrated state!
messy%20pipes%20and%20shit_7511552874.jpg
 

Osiris

Specialist
Sep 19, 2019
83
13
0
South Africa
Ride
2009 E89 BMW z4 35i DCT
Out and good to go, To get pressure tested.
old%20radiator%20finally%20out_2200436261.jpg


Coolant residue showing clearly that its leaking.
radiator%20leak%202_5363402748.jpg


And here is the actual leak:
radiator%20leak_4304932923.jpg


Warranty approved the claim and here is my new radiator in its box!
behr%20radiator_2987566753.jpg


new%20radiator_7147738360.jpg


Problem number one! OEM screw does not fit BEHR radiator! Maybe it does and I just need bigger balls to screw it in and not worry about cracking the plastic but I wasn't willing to take that chance so I went out on saturday morning and found some screws that fit a bit more comfortably.
problematic%20situation%20with%20screw_4737661476.jpg


So While the radiator was out I decided to remove my vanos solenoids and give them a good clean as they have thrown an error once or twice.

Before
img_5262_8539134850.jpg


After
Check all the gunk that came out of these things!
img_5267_8440726068.jpg


Also I saw that my oil filter housing had a oil leak, although I had no idea what scale this oil leak was on. It was VERY bad!
oil%20filter%20housing%20leak_253591714.jpg


oil%20filter%20housing%20leak2_8717401567.jpg


Checked my belts and they seem fine.
So I ordered some new gaskets for this oil filter housing. Damn for two gaskets comes to over a grand! :thumbdo:

I also got a torque wrench from my buddy so that I could do this job the right way!
housing%20removed_5752577725.jpg


Over tightened bolts causing the gasket to pinch and caused this terrible leak. I am lucky this didn't leak onto the belt and cause a catastrophic failure where the belt gets sucked into the engine!
ver%20tightned%20bolts%20causing%20leak_8538245768.jpg


oil filter housing off and stripped and ready for cleaning:
ousing%20main%20part%20gasket%20removal_9431419302.jpg


how%20bad%20the%20leak%20was_1155122788.jpg


Can see how badly its leaking here as well
stuffed%20gaskets_9026385853.jpg


disgusting%20dirty%20thing_2358349119.jpg


After some elbow grease and then used the dremel with a polishing fitting to clean where the oil cooler housing gasket seats.
dremeling%20the%20gasket%20base_5822092066.jpg


Over here you can see that the front top bolt was massively over tightened causing the gasket to pinch and even caused slight damage to the metal where the gasket seats on the engine!
ver%20tightned%20bolts%20causing%20leak_5369921186.jpg


Anyways I got some 2000grit sandpaper and a sanding block to very lightly remove what I could of the coolant build up around that hole and then I used my dremel again to polish this whole thing so that it felt like glass it was so smooth.
il%20filter%20housing%20base%20polished_6123586501.jpg


Now the gasket seals correctly!

Anyways after fitting the new gaskets and refitting the oil filter housing to the car and torquing it to the correct spec I decided it was disgustingly dirty so I decided to do something about this:

This is actually after cleaning and polishing it around a month ago, however I couldn't do it properly because when the oil pipes are back on you cannot get to this thing properly.

Before:
img_5396_4126023091.jpg


After:
Nice and shiny clean:
img_5397_3146692863.jpg


Right Radiator is now all fitted unfortunately I didnt have photos of me putting it back in as it turned out to be a grueling task with my injured shoulder so I just fitted it and then carried on.

Everything back together and cleaned properly:
I also took the car to the car wash where I put the car on a lift and cleaned all the oil that was caused by the oil filter housing to the front of the engine that actually dripped all the way down and dirtied everything under the engine bay too.

Another pic of how nice the oil filter housing is looking.
img_5414_7070144759.jpg


img_5415_6431874460.jpg


So that takes care of all the gaskets, tappet cover gasket was done recently. then sump gasket was done and now oil filter housing gasket has been done.

Next up is an oil flush and change, I am not happy with the state of this so called "New oil that BMW put in my car when they fitted the new turbos!"

Once that is done, I will be fitting my after market big intercooler and charge pipe.

Stay tuned for more updates!
 

Attachments

  • exposing%20radiator_5242444579.jpg
    exposing%20radiator_5242444579.jpg
    361.4 KB · Views: 12
  • protecting%20my%20engine_3084357562.jpg
    protecting%20my%20engine_3084357562.jpg
    336.7 KB · Views: 11
  • car%20jacked%20up_7242603711.jpg
    car%20jacked%20up_7242603711.jpg
    253.5 KB · Views: 11
  • img_4778_6268445714.jpg
    img_4778_6268445714.jpg
    135.2 KB · Views: 12
  • img_5239_725613450.jpg
    img_5239_725613450.jpg
    284 KB · Views: 9
  • intercooler%20out_324650998.jpg
    intercooler%20out_324650998.jpg
    358.1 KB · Views: 9
  • coolant%20leak_694954902.jpg
    coolant%20leak_694954902.jpg
    315.9 KB · Views: 6
  • img_5240_4217969225.jpg
    img_5240_4217969225.jpg
    360.1 KB · Views: 9
  • cooling%20fan%20out_2432884545.jpg
    cooling%20fan%20out_2432884545.jpg
    421.8 KB · Views: 7
  • messy%20pipes%20and%20shit_7511552874.jpg
    messy%20pipes%20and%20shit_7511552874.jpg
    413.9 KB · Views: 7
  • img_4776_4683789163.jpg
    img_4776_4683789163.jpg
    135.6 KB · Views: 8
  • hks_bov_6601648931.jpg
    hks_bov_6601648931.jpg
    130.8 KB · Views: 9
  • why%20i%20hate%20plastidip_7372252023.jpg
    why%20i%20hate%20plastidip_7372252023.jpg
    263.1 KB · Views: 9
  • img_4866_2632832797.jpg
    img_4866_2632832797.jpg
    230.8 KB · Views: 9
  • mirror%20plastidip%20removal_1354243624.jpg
    mirror%20plastidip%20removal_1354243624.jpg
    343.2 KB · Views: 9
  • ing%20while%20im%20removing%20plastidip_1622447781.jpg
    ing%20while%20im%20removing%20plastidip_1622447781.jpg
    192.9 KB · Views: 10
  • plastidip%20all%20gone_7608432304.jpg
    plastidip%20all%20gone_7608432304.jpg
    145.3 KB · Views: 9
  • img_4736_1151597071.jpg
    img_4736_1151597071.jpg
    290.1 KB · Views: 8
  • img_4738_5997377559.jpg
    img_4738_5997377559.jpg
    230.2 KB · Views: 10
  • img_4771_2602802230.jpg
    img_4771_2602802230.jpg
    151.4 KB · Views: 9
  • img_4772_4683789163.jpg
    img_4772_4683789163.jpg
    132 KB · Views: 10
  • img_4774_5479543642.jpg
    img_4774_5479543642.jpg
    185.5 KB · Views: 13